作者:文彪
链接:https://www.cnblogs.com/wenbiao/p/3227998.html
一、灰度发布原理说明
灰度发布在百度百科中解释:
灰度发布是指在黑与白之间,能够平滑过渡的一种发布方式。AB test就是一种灰度发布方式,让一部分用户继续用A,一部分用户开始用B,如果用户对B没有什么反对意见,那么逐步扩大范围,把所有用户都迁移到B上面 来。灰度发布可以保证整体系统的稳定,在初始灰度的时候就可以发现、调整问题,以保证其影响度。
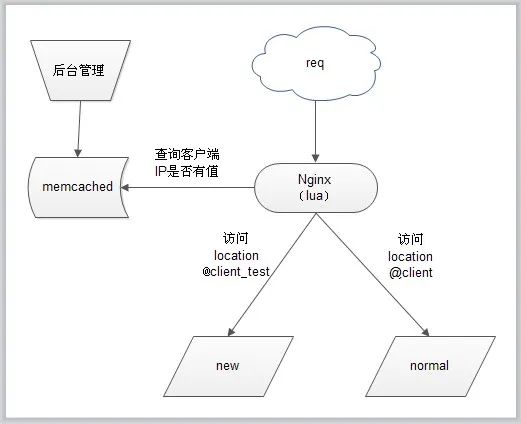
这里的用于WEB系统新代码的测试发布,让一部分(IP)用户访问新版本,一部分用户仍然访问正常版本,其原理如图:
执行过程:
当用户请求到达前端代理服务Nginx,内嵌的lua模块解析Nginx配置文件中的lua脚本代码;
Lua变量获得客户端IP地址,去查询memcached缓存内是否有该键值,如果有返回值执行@client_test,否则执行@client。
Location @client_test把请求转发给部署了new版代码的服务器,location @client把请求转发给部署了normal版代码的服务器,服务器返回结果。整个过程完成。
下面把安装配置过程详细说明。
二、安装配置过程详解
1、安装nginx
安装依赖包
yum -y install gcc gcc-c++ autoconf libjpeg libjpeg-devel libpng libpng-devel freetype freetype-devel libxml2 libxml2-devel zlib zlib-devel glibc glibc-devel glib2 glib2-devel bzip2 bzip2-devel ncurses ncurses-devel curl curl-devel e2fsprogs e2fsprogs-devel krb5 krb5-devel libidn libidn-devel openssl openssl-devel openldap openldap-devel nss_ldap openldap-clients openldap-servers make pcre-devel

yum -y install gd gd2 gd-devel gd2-devel lua lua-devel

yum –y install memcached
下载lua模块、lua-memcache操作库文件和nginx包
wget https://github.com/simpl/ngx_devel_kit/archive/v0.2.18.tar.gz
wget https://github.com/chaoslawful/lua-nginx-module/archive/v0.8.5.tar.gz
wget https:
//github.com/agentzh/lua-resty-memcached/archive/v0.11.tar.gz
wget http://nginx.org/download/nginx-1.4.2.tar.gz
#解压编译安装
tar xvf nginx-1.4.2.tar.gz
cd nginx-1.4.2/
./configure \
--prefix=/soft/nginx/ \
--with-http_gzip_static_module \
--add-module=/root/ngx_devel_kit-0.2.18/ \
--add-module=/root/lua-nginx-module-0.8.5/
make&&make install
拷贝lua的memcached操作库文件
tar xvf v0.11.tar.gz

cp -r lua-resty-memcached-0.11/lib/resty/ /usr/lib64/lua/5.1/
配置nginx
#vim /soft/nginx/conf/nginx.conf
worker_processes 1;
events {
worker_connections 1024;
}
http {
include mime.types;
default_type application/octet-stream;
sendfile on;
keepalive_timeout 65;
proxy_next_upstream error timeout;
proxy_redirect off;
proxy_set_header Host $host;
proxy_set_header X-Real-IP $http_x_forwarded_for;
proxy_set_header X-Forwarded-For $proxy_add_x_forwarded_for;
client_max_body_size 100m;
client_body_buffer_size 256k;
proxy_connect_timeout 180;
proxy_send_timeout 180;
proxy_read_timeout 180;
proxy_buffer_size 8k;
proxy_buffers 8 64k;
proxy_busy_buffers_size 128k;
proxy_temp_file_write_size 128k;
upstream client {
server 192.168.200.29:80;
}
upstream client_test {
server 192.168.200.29:81;
}
server {
listen 80;
server_name localhost;
location / {
content_by_lua '
clientIP = ngx.req.get_headers()["X-Real-IP"]
if clientIP == nil then
clientIP = ngx.req.get_headers()["x_forwarded_for"]
end
if clientIP == nil then
clientIP = ngx.var.remote_addr
end
local memcached = require "resty.memcached"
local memc, err = memcached:new()
if not memc then
ngx.say("failed to instantiate memc: ", err)
return
end
local ok, err = memc:connect("127.0.0.1", 11211)
if not ok then
ngx.say("failed to connect: ", err)
return
end
local res, flags, err = memc:get(clientIP)
if err then
ngx.say("failed to get clientIP ", err)
return
end
if res == "1" then
ngx.exec("@client_test")
return
end
ngx.exec("@client")
';
}
location @client{
proxy_pass http://client;
}
location @client_test{
proxy_pass http://client_test;
}
location /hello {
default_type 'text/plain';
content_by_lua 'ngx.say("hello, lua")';
}
location = /50x.html {
root html;
}
}
}
检测配置文件。
#/soft/nginx/sbin/nginx -t

nginx: the configuration file /soft/nginx/conf/nginx.conf syntax is ok

nginx: configuration file /soft/nginx/conf/nginx.conf test is successful
启动nginx
启动memcached服务
memcached -u nobody -m 1024 -c 2048 -p 11211 –d
三、测试验证
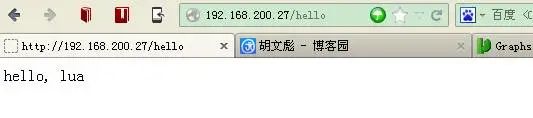
测试lua模块是否运行正常
访问http://测试服务器ip地址/hello。如果显示:hello,lua 表示安装成功。
在另一台测试机(这里是192.168.200.29)设置两个虚拟主机,一个用80端口是执行正常代码,一个是81端口执行灰度测试代码。
在memcached中以你的客户机IP地址为key,value值为1。这里我的IP是192.168.68.211.
telnet localhost 11211
Trying ::1...
Connected to localhost.
Escape character is '^]'.
set 192.168.68.211 0 3600 1
1
STORED
get 192.168.68.211
VALUE 192.168.68.211 9 1
1
END
quit
注意:
set后第一个值为key值。
192.168.68.211这是key值是需要灰度测试的IP地址;
0 表示一个跟该key有关的自定义数据;
3600 表示该key值的有效时间;
1 表示key所对应的value值的字节数。
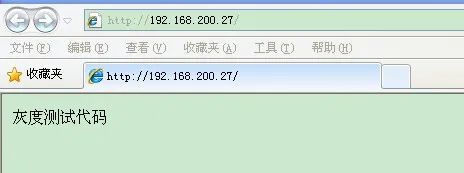
下面访问Nginx,效果符合预期,我的IP已经在memcached中存储值,所以请求转发给执行灰度测试代码的主机。
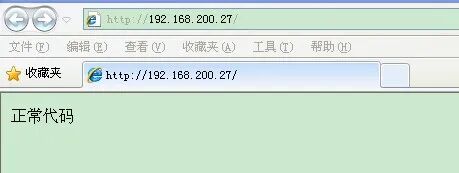
从memcached删除我的主机IP值。
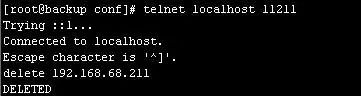
再次请求Nginx,请求转发给执行正常代码内容的主机。
整个配置并不复杂,整个判断过程对服务的影响非常小。如果需要使用这个系统最好自己看看lua脚本。

前端开发


