https://blog.csdn.net/qq_36758914/article/details/106303928
一、项目说明
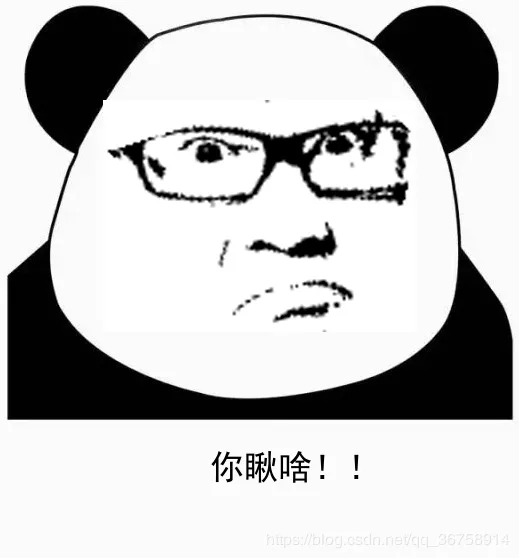
在日常生活中,我们经常会存取一些朋友们的丑照,在这个项目中,我们以萌萌哒的熊猫头作为背景,然后试着在背景图上加入朋友们的照片。效果如下图所示:

二、实现步骤
三、Python 实现
1、导入需要的库
import cv2
import numpy as mp
import matplotlib.pyplot as plt
from PIL import Image, ImageDraw, ImageFont
这个项目主要是通过 opencv 完成,但如果要在表情包下面写中文的话,PIL(pillow)库是必不可少的。
2、绘图函数
这里写一个绘图函数,方便绘图操作。
def plt_show(img):
    imageRGB = cv2.cvtColor(img, cv2.COLOR_BGR2RGB)
    plt.imshow(imageRGB)
    plt.show()
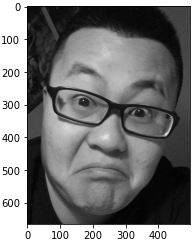
3、导入前景照片
image = cv2.imread('SXC.jpg', 0)  # 导入灰度图即可
plt_show(image)
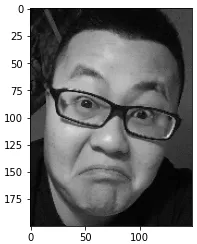
4、等比例缩放前景照片
因为我们发现前景照片的尺寸比背景尺寸还要大,这显然是不合适的,所以要先对其进行等比例(0.3)缩放。
image_resize = cv2.resize(image, None, fx=0.3, fy=0.3, interpolation = cv2.INTER_CUBIC)
plt_show(image_resize)
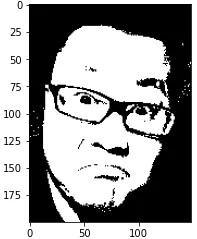
5、对前景照片进行二值化处理
在这里,我们将像素值大于 80 的区域设置为 255;小于 80 的区域设置成 0。
ret, image_binary = cv2.threshold(image_resize, 80, 255, cv2.THRESH_BINARY)
plt_show(image_binary)
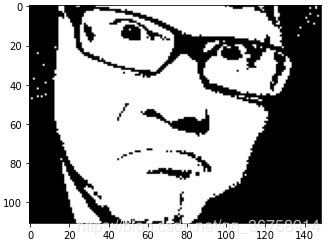
6、提取出感兴趣区域
image_roi = image_binary[74: 185, 0: 150]
plt_show(image_roi)
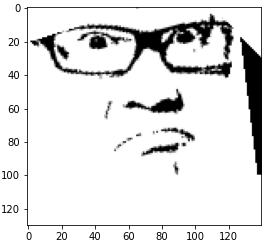
7、旋转图片
因为我们的背景图片(熊猫头)是正的,而前景图片有些向右倾斜,所以要先对其进行旋转操作(大概逆时针旋转 15 度即可)。
rows, cols = image_roi.shape
M = cv2.getRotationMatrix2D(((cols-1)/2.0, (rows-1)/2.0), 15, 1)  # (旋转中心,逆时针旋转角度,各个方向同等扩大比例)
image_rotate = cv2.warpAffine(image_roi, M, (140, 130))  # (140, 130) 是指旋转后的画布大小
plt_show(image_rotate)

8、将一些不需要的黑色区域删除掉
在这里我们使用 cv2.fillPoly 函数对不需要的区域用白色进行填充。
h, w = image_rotate.shape

image_rotate_copy = image_rotate.copy()
pts1 = np.array([[0, 20],  [64, 0], [0, 0]], np.int32)
pts2 = np.array([[0, 18],  [0, h], [80, h]], np.int32)
pts3 = np.array([[0, 100],  [0, h], [w, h], [w, 100]], np.int32)
pts4 = np.array([[111, 0],  [w, 0], [w, 30]], np.int32)
pts5 = np.array([[124, 0],  [115, h], [w, h]], np.int32)
pts6 = np.array([[120, 40],  [95, 100], [120, 100]], np.int32)
foreground = cv2.fillPoly(image_rotate_copy, [pts1], (255, 255, 255))  # (图片,填充区域,填充颜色)
foreground = cv2.fillPoly(image_rotate_copy, [pts2], (255, 255, 255))
foreground = cv2.fillPoly(image_rotate_copy, [pts3], (255, 255, 255))
foreground = cv2.fillPoly(image_rotate_copy, [pts4], (255, 255, 255))
foreground = cv2.fillPoly(image_rotate_copy, [pts5], (255, 255, 255))
foreground = cv2.fillPoly(image_rotate_copy, [pts6], (255, 255, 255))

plt_show(foreground)
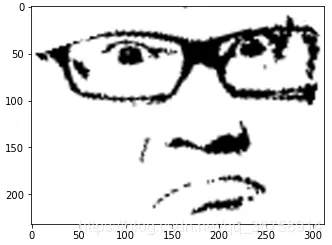
9、再次提取感兴趣区域并缩放
foreground_roi = foreground[0: 93, 0: 125]
plt_show(foreground_roi)

foreground_roi_resize = cv2.resize(foreground_roi, None, fx=2.5, fy=2.5, interpolation = cv2.INTER_CUBIC)
plt_show(foreground_roi_resize)

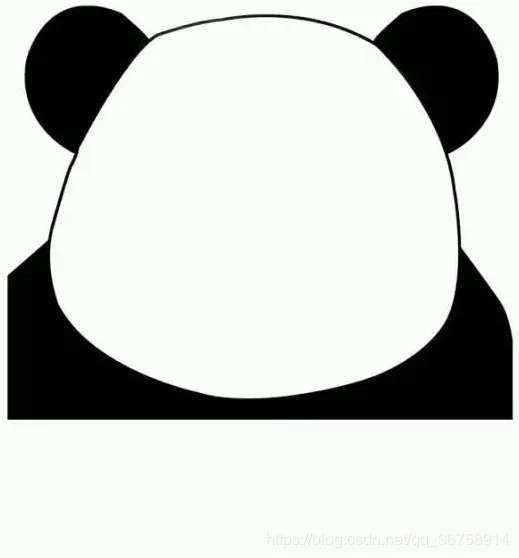
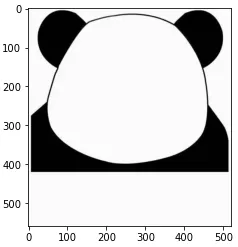
10、导入背景图片
background = cv2.imread('back.jpg', 0)
plt_show(background)
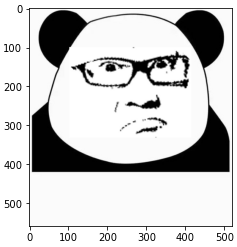
11、组合两张图片成表情包
h_f, w_f = foreground.shape
h_b, w_b = background.shape

left = (w_b - w_f)//2  # 前景图片在背景图片中的左边的横坐标
right = left + w_f  # 前景图片在背景图片中的右边的横坐标
top = 100  # 前景图片在背景图片中的上边的纵坐标
bottom = top + h_f  # 前景图片在背景图片中的下边的纵坐标

emoji = background
emoji[top: bottom, left: right] = foreground
plt_show(emoji)
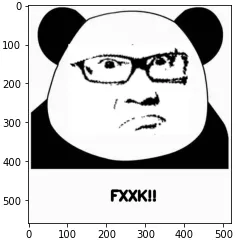
12、在表情包下面添加文本
12.1 添加英文文本
如果只是要添加英文文本,用 opencv 就可以解决:
emoji_copy = emoji.copy()
# (图片,文本,位置,字体,文本大小,文本颜色,文本粗细)
cv2.putText(emoji_copy, "FXXK!!", (210, 500), cv2.FONT_HERSHEY_SIMPLEX, 1.2, (0, 0, 0), 5)
plt_show(emoji_copy)
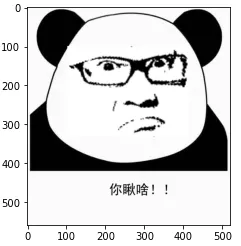
12.2 添加中文文本
如果要添加中文文本,我们需要借助 PIL 库来实现。
PilImg = Image.fromarray(emoji)  # cv2 转 PIL
draw = ImageDraw.Draw(PilImg)  # 创建画笔
ttfront = ImageFont.truetype('simhei.ttf', 34)  # 设置字体
draw.text((210, 450),"你瞅啥!!",fill=0, font=ttfront)  # (位置,文本,文本颜色,字体)
emoji_text = cv2.cvtColor(np.array(PilImg),cv2.COLOR_RGB2BGR)  # PIL 转回 cv2
plt_show(emoji_text)
13、保存表情包
cv2.imwrite('./emoji.png', np.array(emoji_text))
四、完整代码
import cv2
import numpy as mp
import matplotlib.pyplot as plt
from PIL import Image, ImageDraw, ImageFont
def plt_show(img):
imageRGB = cv2.cvtColor(img, cv2.COLOR_BGR2RGB)
plt.imshow(imageRGB)
plt.show()
image = cv2.imread('SXC.jpg', 0) # 导入前景图片
image_resize = cv2.resize(image, None, fx=0.3, fy=0.3, interpolation = cv2.INTER_CUBIC) # 缩放
ret, image_binary = cv2.threshold(image_resize, 80, 255, cv2.THRESH_BINARY) # 图片二值化
image_roi = image_binary[74: 185, 0: 150] # 感兴趣区域
rows, cols = image_roi.shape
# 旋转
M = cv2.getRotationMatrix2D(((cols-1)/2.0, (rows-1)/2.0), 15, 1)
image_rotate = cv2.warpAffine(image_roi, M, (140, 130))
# 填充不需要的区域
h, w = image_rotate.shape
image_rotate_copy = image_rotate.copy()
pts1 = np.array([[0, 20], [64, 0], [0, 0]], np.int32)
pts2 = np.array([[0, 18], [0, h], [80, h]], np.int32)
pts3 = np.array([[0, 100], [0, h], [w, h], [w, 100]], np.int32)
pts4 = np.array([[111, 0], [w, 0], [w, 30]], np.int32)
pts5 = np.array([[124, 0], [115, h], [w, h]], np.int32)
pts6 = np.array([[120, 40], [95, 100], [120, 100]], np.int32)
foreground = cv2.fillPoly(image_rotate_copy, [pts1], (255, 255, 255))
foreground = cv2.fillPoly(image_rotate_copy, [pts2], (255, 255, 255))
foreground = cv2.fillPoly(image_rotate_copy, [pts3], (255, 255, 255))
foreground = cv2.fillPoly(image_rotate_copy, [pts4], (255, 255, 255))
foreground = cv2.fillPoly(image_rotate_copy, [pts5], (255, 255, 255))
foreground = cv2.fillPoly(image_rotate_copy, [pts6], (255, 255, 255))
foreground_roi = foreground[0: 93, 0: 125]
foreground_roi_resize = cv2.resize(foreground_roi, None, fx=2.5, fy=2.5, interpolation = cv2.INTER_CUBIC)
background = cv2.imread('back.jpg', 0) # 导入背景图片
# 拼接两张图片
h_f, w_f = foreground_roi_resize.shape
h_b, w_b = background.shape
left = (w_b - w_f)//2
right = left + w_f
top = 80
bottom = top + h_f
emoji = background
emoji[top: bottom, left: right] = foreground_roi_resize
PilImg = Image.fromarray(emoji) # cv2 转 PIL
draw = ImageDraw.Draw(PilImg) # 创建画笔
ttfront = ImageFont.truetype('simhei.ttf', 34) # 设置字体
draw.text((210, 450),"你瞅啥!!",fill=0, font=ttfront) # (位置,文本,文本颜色,字体)
emoji_text = cv2.cvtColor(np.array(PilImg),cv2.COLOR_RGB2BGR) # PIL 转回 cv2
cv2.imwrite('./emoji.png', np.array(emoji_text)) # 保存表情包


