520小编也是吃到了一大波狗粮啊,有钱的超级浪漫,没钱的也很会玩!所以小编今天决定还是教大家来做一款表白神器,就算这次用不着没下次也是肯定可以用的着的!


今天,我就来教大家一下,如何用Python做一份特别的礼物送给自己的恋人。

当然了,如果还是单身的,也可以把这个作为表白神器,和心爱的人表白。
会Python编程的人当然不用我说,就知道该如何操作,那些不懂编程的人,如果想尝试,那该怎么办呢?

首先教大家一个初级版的。这个就比较简单,利用Python制作一个爱心。
我先把代码给贴出来:
import turtle
import time
# 画爱心的顶部
def LittleHeart():
for i in range (200):
turtle.right(1)
turtle.forward(2)
# 输入表白的语句,默认I Love you
love=input('Please enter a sentence of love, otherwise the default is "I Love you":\n')
#输入署名或者赠谁,没有不执行
me=input('Please enter pen name, otherwise the default do not execute:\n')
if love=='':
love='I Love you'
# 窗口大小
turtle.setup(width=900, height=500)
# 颜色
turtle.color('red','pink')
# 笔粗细
turtle.pensize(3)
# 速度
turtle.speed(1)
# 提笔
turtle.up()
# 隐藏笔
turtle.hideturtle()
# 去到的坐标,窗口中心为0,0
turtle.goto(0,-180)
turtle.showturtle()
# 画上线
turtle.down()
turtle.speed(1)
turtle.begin_fill()
turtle.left(140)
turtle.forward(224)
#调用画爱心左边的顶部
LittleHeart()
#调用画爱右边的顶部
turtle.left(120)
LittleHeart()
# 画下线
turtle.forward(224)
turtle.end_fill()
turtle.pensize(5)
turtle.up()
turtle.hideturtle()
# 在心中写字 一次
turtle.goto(0,0)
turtle.showturtle()
turtle.color('#CD5C5C','pink')
#在心中写字 font可以设置字体自己电脑有的都可以设 align开始写字的位置
turtle.write(love,font=('gungsuh',30,),align="center")
turtle.up()
turtle.hideturtle()
time.sleep(2)
# 在心中写字 二次
turtle.goto(0,0)
turtle.showturtle()
turtle.color('red','pink')
turtle.write(love,font=('gungsuh',30,),align="center")
turtle.up()
turtle.hideturtle()
# 写署名
if me !='':
turtle.color('black', 'pink')
time.sleep(2)
turtle.goto(180,-180)
turtle.showturtle()
turtle.write(me, font=(20,), align="center", move=True)
#点击窗口关闭
window=turtle.Screen()
window.exitonclick()
这个代码最终呈现效果如下,这个是比较初级简单的爱心,没有什么高难度。你也可以把代码扩充一下,整的更加高大上一些。


import turtle
import random
def love(x, y): # 在(x,y)处画爱心lalala
lv = turtle.Turtle()
lv.hideturtle()
lv.up()
lv.goto(x, y) # 定位到(x,y)
def curvemove(): # 画圆弧
for i in range(20):
lv.right(10)
lv.forward(2)
lv.color('red', 'pink')
lv.speed(10000000)
lv.pensize(1)
# 开始画爱心lalala
lv.down()
lv.begin_fill()
lv.left(140)
lv.forward(22)
curvemove()
lv.left(120)
curvemove()
lv.forward(22)
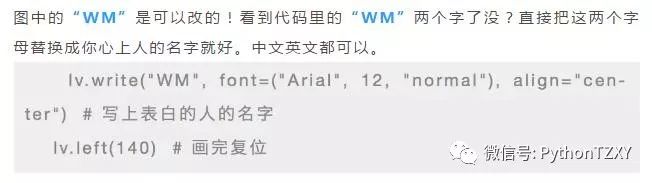
lv.write("WM", font=("Arial", 12, "normal"), align="center") # 写上表白的人的名字
lv.left(140) # 画完复位
lv.end_fill()
def tree(branchLen, t):
if branchLen > 5: # 剩余树枝太少要结束递归
if branchLen < 20: # 如果树枝剩余长度较短则变绿
t.color("green")
t.pensize(random.uniform((branchLen + 5) / 4 - 2, (branchLen + 6) / 4 + 5))
t.down()
t.forward(branchLen)
love(t.xcor(), t.ycor()) # 传输现在turtle的坐标
t.up()
t.backward(branchLen)
t.color("brown")
return
t.pensize(random.uniform((branchLen + 5) / 4 - 2, (branchLen + 6) / 4 + 5))
t.down()
t.forward(branchLen)
# 以下递归
ang = random.uniform(15, 45)
t.right(ang)
tree(branchLen - random.uniform(12, 16), t) # 随机决定减小长度
t.left(2 * ang)
tree(branchLen - random.uniform(12, 16), t) # 随机决定减小长度
t.right(ang)
t.up()
t.backward(branchLen)
myWin = turtle.Screen()
t = turtle.Turtle()
t.hideturtle()
t.speed(1000)
t.left(90)
t.up()
t.backward(200)
t.down()
t.color("brown")
t.pensize(32)
t.forward(60)
tree(100, t)
myWin.exitonclick()


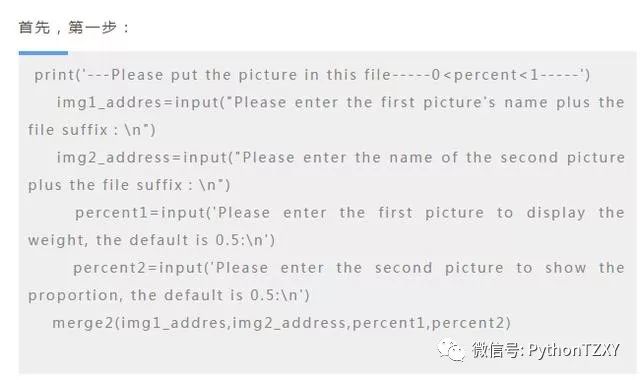
先第一个:画像重叠。
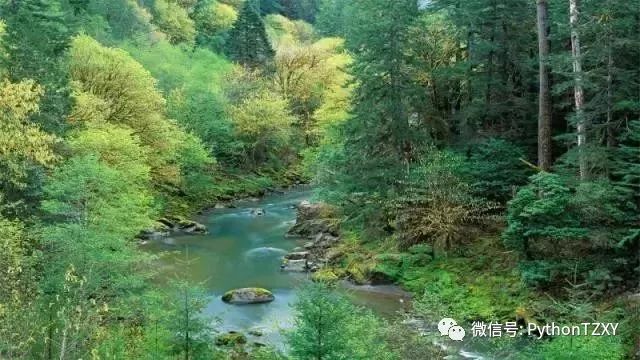
我们先选择两幅画,你们也可以一幅选你们心上人的画像,一幅选择风景或者其他。这个时候就看各位的审美了。这里我选择的都是风景。

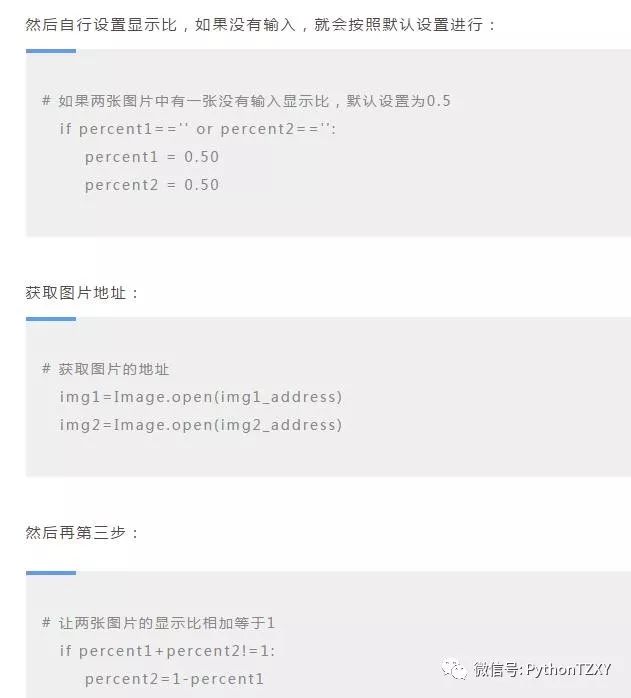
再获取图片宽高:
# 获取图片的最小宽高
width = min(img1.size[0],img2.size[0])
height = min(img1.size[1],img2.size[1])
img_new = Image.new('RGB',(width,height))
这时候渲染图片:
# 渲染图片
for x in range(width):
for y in range(height):
r1,g1,b1=img1.getpixel((x,y))
r2,g2,b2=img2.getpixel((x,y))
r=int(percent1*r1+percent2*r2)
g=int(percent1*g1+percent2*g2)
b=int(percent1*b1+percent2*b2)
img_new.putpixel((x,y),(r,g,b))
最后保存就好了!
# 保存图片
img_new.save('new.jpg')

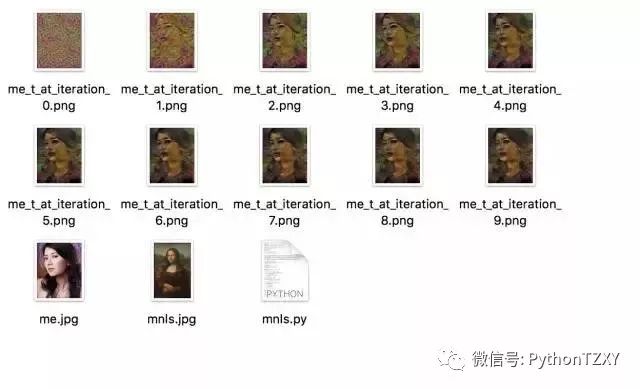
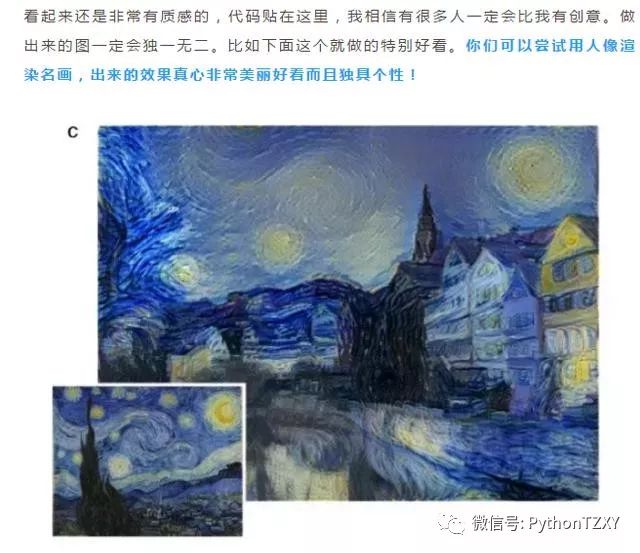
第二个是图像渲染:
通过Python的深度学习算法包去训练计算机模仿世界名画的风格,然后应用到另一幅画中!
这个就没有小程序了。因为这个有几百个依赖包。
专业难度比较高一些,首先,需要安装使用的模块,pip一键搞定:
pip3 install keras
pip3 install h5py
pip3 install tensorflow
TensorFlow的安装可能不翻墙的话下载的比较慢,也可以源码安装。自己把握。(TensorFlow只能python3.5安装,所以先下载一个3.5版本的)
然后再下载VGG16模型。把代码生成py格式和需要渲染图片放在同一个文件夹。
我先把代码贴出来(这个代码是根据知乎大佬:杨航锋的代码修改而成):
from __future__ import print_function
from keras.preprocessing.image import load_img, img_to_array
from scipy.misc import imsave
import numpy as np
import time
import argparse
from keras.applications import vgg16
from keras import backend as K
from scipy.optimize.lbfgsb import fmin_l_bfgs_b
parser = argparse.ArgumentParser(description='Neural style transfer with Keras.')
parser.add_argument('base_image_path', metavar='base', type=str,help='Path to the image to transform.')
parser.add_argument('style_reference_image_path', metavar='ref', type=str, help='Path to the style reference image.')
parser.add_argument('result_prefix', metavar='res_prefix', type=str,help='Prefix for the saved results.')
parser.add_argument('--iter', type=int, default=15, required=False,help='Number of iterations to run.')
parser.add_argument('--content_weight', type=float, default=0.025, required=False,help='Content weight.')
parser.add_argument('--style_weight', type=float, default=1.0, required=False,help='Style weight.')
parser.add_argument('--tv_weight', type=float, default=1.0, required=False,help='Total Variation weight.')
args = parser.parse_args()
base_image_path = args.base_image_path
style_reference_image_path = args.style_reference_image_path
result_prefix = args.result_prefix
iterations = args.iter
# 不同损失分量的权重
total_variation_weight = args.tv_weight
style_weight = args.style_weight
content_weight = args.content_weight
# 生成图片的尺寸
width, height = load_img(base_image_path).size
img_nrows = 400
img_ncols = int(width * img_nrows / height)
# util function to open, 调整和格式化图片到适当的张量
def preprocess_image(image_path):
img = load_img(image_path, target_size=(img_nrows, img_ncols))
img = img_to_array(img)
img = np.expand_dims(img, axis=0)
img = vgg16.preprocess_input(img)
return img
# util函数将一个张量转换成一个有效的图像
def deprocess_image(x):
if K.image_data_format() == 'channels_first':
x = x.reshape((3, img_nrows, img_ncols))
x = x.transpose((1, 2, 0))
else:
x = x.reshape((img_nrows, img_ncols, 3))
# Remove zero-center by mean pixel
# 用平均像素去除零中心
x[:, :, 0] += 103.939
x[:, :, 1] += 116.779
x[:, :, 2] += 123.68
# 'BGR'->'RGB' 转换
x = x[:, :, ::-1]
x = np.clip(x, 0, 255).astype('uint8')
return x
# get tensor representations of our images
# 得到图像的张量表示
base_image = K.variable(preprocess_image(base_image_path))
style_reference_image = K.variable(preprocess_image(style_reference_image_path))
# this will contain our generated image
# 包含我们生成的图片
if K.image_data_format() == 'channels_first':
combination_image = K.placeholder((1, 3, img_nrows, img_ncols))
else:
combination_image = K.placeholder((1, img_nrows, img_ncols, 3))
# combine the 3 images into a single Keras tensor
# 将3个图像合并成一个Keras张量
input_tensor = K.concatenate([base_image,
style_reference_image,
combination_image], axis=0)
# build the VGG16 network with our 3 images as input
# the model will be loaded with pre-trained ImageNet weights
# 以我们的3个图像作为输入构建VGG16网络
# 该模型将加载预先训练的ImageNet权重
model = vgg16.VGG16(input_tensor=input_tensor,
weights='imagenet', include_top=False)
print('Model loaded.')
# get the symbolic outputs of each "key" layer (we gave them unique names).
# 获取每个“键”层的符号输出(我们给它们取了唯一的名称)
outputs_dict = dict([(layer.name, layer.output) for layer in model.layers])
# compute the neural style loss
# 计算神经类型的损失
# first we need to define 4 util functions
# 首先我们需要定义是个until函数
# the gram matrix of an image tensor (feature-wise outer product)
# 图像张量的克矩阵
def gram_matrix(x):
assert K.ndim(x) == 3
if K.image_data_format() == 'channels_first':
features = K.batch_flatten(x)
else:
features = K.batch_flatten(K.permute_dimensions(x, (2, 0, 1)))
gram = K.dot(features, K.transpose(features))
return gram
# the "style loss" is designed to maintain
# 风格损失”是为了维护而设计的
# the style of the reference image in the generated image.
# 生成图像中引用图像的样式
# It is based on the gram matrices (which capture style) of feature maps from the style reference image and from the generated image
# 它基于从样式引用图像和生成的图像中获取特征映射的gram矩阵(捕获样式)
def style_loss(style, combination):
assert K.ndim(style) == 3
assert K.ndim(combination) == 3
S = gram_matrix(style)
C = gram_matrix(combination)
channels = 3
size = img_nrows * img_ncols
return K.sum(K.square(S - C)) / (4. * (channels ** 2) * (size ** 2))
# an auxiliary loss function
# 一个辅助的损失函数
# designed to maintain the "content" of the base image in the generated image
#设计用于维护生成图像中基本图像的“内容
def content_loss(base, combination):
return K.sum(K.square(combination - base))
# the 3rd loss function, total variation loss,designed to keep the generated image locally coherent
# 第三个损失函数,总变异损失,设计来保持生成的图像局部一致
def total_variation_loss(x):
assert K.ndim(x) == 4
if K.image_data_format() == 'channels_first':
a = K.square(x[:, :, :img_nrows - 1, :img_ncols - 1] - x[:, :, 1:, :img_ncols - 1])
b = K.square(x[:, :, :img_nrows - 1, :img_ncols - 1] - x[:, :, :img_nrows - 1, 1:])
else:
a = K.square(x[:, :img_nrows - 1, :img_ncols - 1, :] - x[:, 1:, :img_ncols - 1, :])
b = K.square(x[:, :img_nrows - 1, :img_ncols - 1, :] - x[:, :img_nrows - 1, 1:, :])
return K.sum(K.pow(a + b, 1.25))
# combine these loss functions into a single scalar
# 将这些损失函数合并成一个标量。
loss = K.variable(0.)
layer_features = outputs_dict['block4_conv2']
base_image_features = layer_features[0, :, :, :]
combination_features = layer_features[2, :, :, :]
loss += content_weight * content_loss(base_image_features,
combination_features)
feature_layers = ['block1_conv1', 'block2_conv1',
'block3_conv1', 'block4_conv1',
'block5_conv1']
for layer_name in feature_layers:
layer_features = outputs_dict[layer_name]
style_reference_features = layer_features[1, :, :, :]
combination_features = layer_features[2, :, :, :]
sl = style_loss(style_reference_features, combination_features)
loss += (style_weight / len(feature_layers)) * sl
loss += total_variation_weight * total_variation_loss(combination_image)
# get the gradients of the generated image wrt the loss
# 得到所生成图像的梯度,并对损失进行wrt。
grads = K.gradients(loss, combination_image)
outputs = [loss]
if isinstance(grads, (list, tuple)):
outputs += grads
else:
outputs.append(grads)
f_outputs = K.function([combination_image], outputs)
def eval_loss_and_grads(x):
if K.image_data_format() == 'channels_first':
x = x.reshape((1, 3, img_nrows, img_ncols))
else:
x = x.reshape((1, img_nrows, img_ncols, 3))
outs = f_outputs([x])
loss_value = outs[0]
if len(outs[1:]) == 1:
grad_values = outs[1].flatten().astype('float64')
else:
grad_values = np.array(outs[1:]).flatten().astype('float64')
return loss_value, grad_values
"""
this Evaluator class makes it possible
to compute loss and gradients in one pass
while retrieving them via two separate functions,
"loss" and "grads". This is done because scipy.optimize
requires separate functions for loss and gradients,
but computing them separately would be inefficient.
这个评估器类使它成为可能。
在一个通道中计算损耗和梯度。
当通过两个不同的函数检索它们时,
“损失”和“梯度”。这是因为scipy.optimize
要求分离的函数用于损失和梯度,
但是单独计算它们将是低效的
"""
class Evaluator(object):
def __init__(self):
self.loss_value = None
self.grads_values = None
def loss(self, x):
assert self.loss_value is None
loss_value, grad_values = eval_loss_and_grads(x)
self.loss_value = loss_value
self.grad_values = grad_values
return self.loss_value
def grads(self, x):
assert self.loss_value is not None
grad_values = np.copy(self.grad_values)
self.loss_value = None
self.grad_values = None
return grad_values
evaluator = Evaluator()
# run scipy-based optimization (L-BFGS) over the pixels of the generated image
# 运行 scipy-based optimization (L-BFGS) 覆盖 生成的图像的像素
# so as to minimize the neural style loss
# 这样可以减少神经类型的损失
if K.image_data_format() == 'channels_first':
x = np.random.uniform(0, 255, (1, 3, img_nrows, img_ncols)) - 128.
else:
x = np.random.uniform(0, 255, (1, img_nrows, img_ncols, 3)) - 128.
for i in range(iterations):
print('Start of iteration', i)
start_time = time.time()
x, min_val, info = fmin_l_bfgs_b(evaluator.loss, x.flatten(),
fprime=evaluator.grads, maxfun=20)
print('Current loss value:', min_val)
# save current generated image
img = deprocess_image(x.copy())
fname = result_prefix + '_at_iteration_%d.png' % i
imsave(fname, img)
end_time = time.time()
print('Image saved as', fname)
print('Iteration %d completed in %ds' % (i, end_time - start_time))
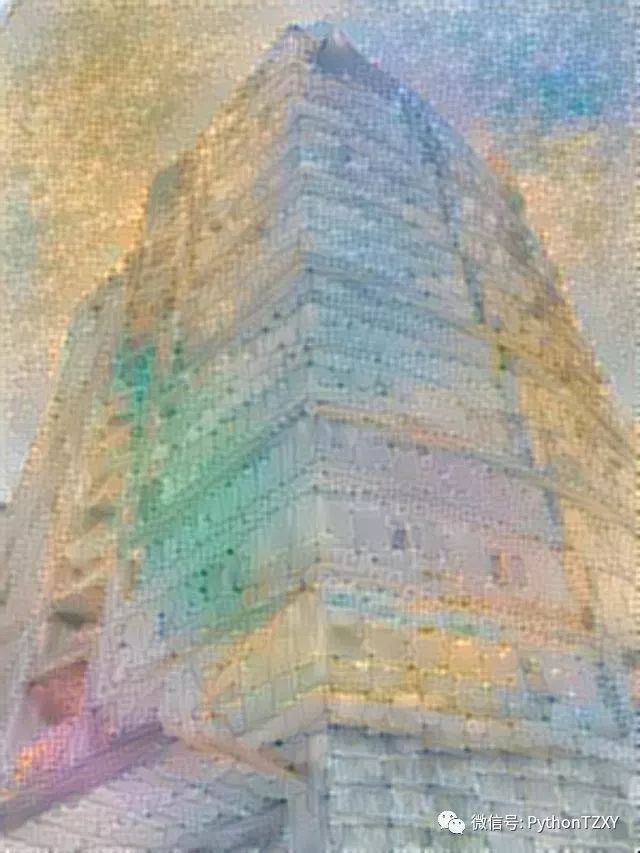
它会有一个不断渐进渲染的过程:
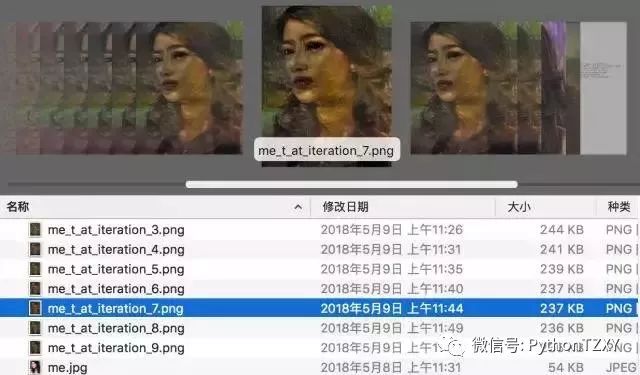
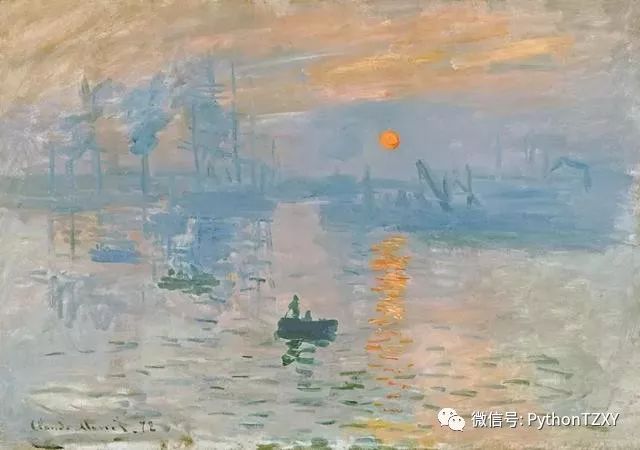
虽然我有老婆,而且我老婆特别好看,漂亮。但是为了不伤害到你们,我就用万门的新起点嘉园大楼渲染一下莫奈的名画。给你们具体看一下。


其实,只要是自己用心做出的礼物,你喜欢的人一定会非常感动。

愿每一个渴望恋爱的人都能在520这天找到自己的心有所属。

转载于:万门
欢迎大家关注我的博客或者公众号:https://home.cnblogs.com/u/Python1234/ Python学习交流


