前言
2019 年底开始蔓延的新型肺炎疫情牵动人心,作为个体,我们力所能及的就是尽量待在家中少出门。
看到一些朋友叫设计同学帮忙给自己的头像戴上口罩,作为技术人,心想一定还有更多人有这样的诉求,不如开发一个简单的程序来实现这个需求,也算是帮助设计姐姐减少工作量。
于是花了些时间,写了一个叫做 face-mask[1] 的命令行工具,能够轻松的给图片中的人像戴上口罩,而且口罩的方向和大小都是适应人脸的哦~
使用
安装 face-mask
确保 Python 版本在 3.6 及以上
pip install face-mask
使用 face-mask
直接指定图片路径即可为图片中的人像戴上口罩,并会生成一个新的图片(额外有 -with-mask 后缀):
face-mask /path/to/face/picture
通过指定 --show 选项,还可以使用默认图片查看器打开新生成的图片:
face-mask /path/to/face/picture --show
效果
给一个人戴上口罩

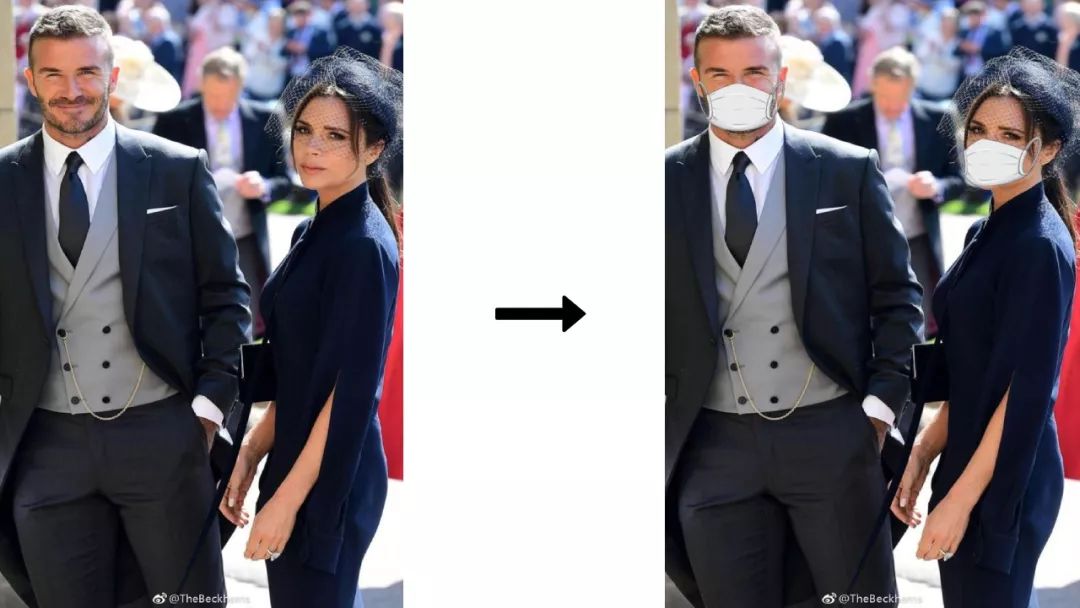
给多个人戴上口罩
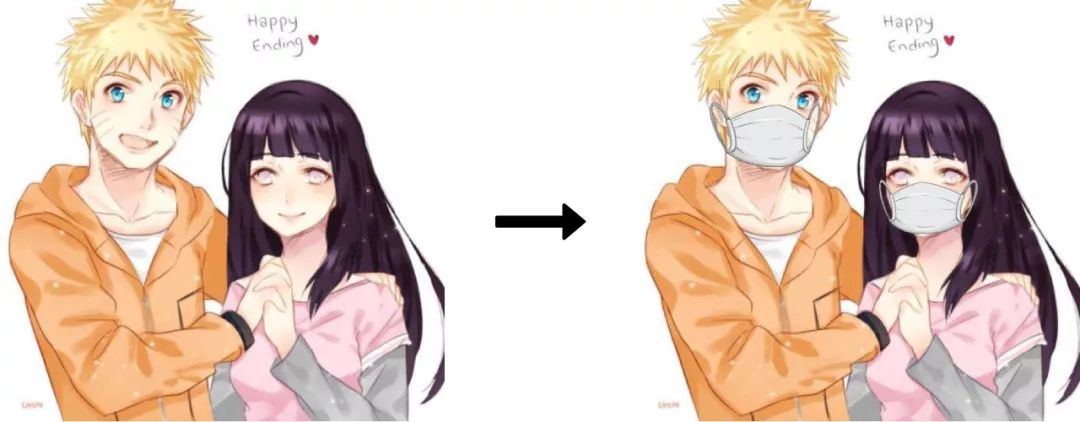
给动漫人物戴上口罩
实现
思路
要想实现上面的效果,我们应该怎么做?不妨这么想:
- 首先是识别出人的鼻子( nose_bridge )和脸轮廓( chin )
- 通过脸轮廓确定出脸左点( chin_left_point )、脸底点( chin_bottom_point )和脸右点( chin_right_point )
关于人脸识别,可以使用 face_recognition[2] 库进行识别。
关于图像处理,可以使用 Pillow[3] 库进行处理。
代码
有了思路之后,实现就是件相对轻松的事情。不过对库的熟悉和图片的变换计算可能要花些时间。
详细的代码请阅读 face-mask[4]。这里仅说明下最核心的步骤。
人脸识别
import face_recognition

face_image_np = face_recognition.load_image_file('/path/to/face/picture')
face_landmarks = face_recognition.face_landmarks(face_image_np)
借助 face_recognition 库可以轻松的识别出人像,最终得到的 face_landmarks 是一个列表,里面的每个 face_landmark 都表示一个人像数据。
face_landmark 是一个字典,其中的键表示人像特征,值表示该特征的点的列表。比如:
我们需要根据每个 face_landmark,给对应的头像戴上口罩。
获得鼻子和脸颊的特征点
import numpy as np

nose_bridge = face_landmark['nose_bridge']
nose_point = nose_bridge[len(nose_bridge) * 1 // 4]
nose_v = np.array(nose_point)

chin = face_landmark['chin']
chin_len = len(chin)
chin_bottom_point = chin[chin_len // 2]
chin_bottom_v = np.array(chin_bottom_point)
chin_left_point = chin[chin_len // 8]
chin_right_point = chin[chin_len * 7 // 8]
通过上述代码,我们获得了:
拆分、缩放和合并口罩
from PIL import Image

_face_img = Image.fromarray(face_image_np)
_mask_img = Image.open('/path/to/mask/picture')

# split mask and resize
width = _mask_img.width
height = _mask_img.height
width_ratio = 1.2
new_height = int(np.linalg.norm(nose_v - chin_bottom_v))

# left
mask_left_img = _mask_img.crop((0, 0, width // 2, height))
mask_left_width = get_distance_from_point_to_line(chin_left_point, nose_point, chin_bottom_point)
mask_left_width = int(mask_left_width * width_ratio)
mask_left_img = mask_left_img.resize((mask_left_width, new_height))

# right
mask_right_img = _mask_img.crop((width // 2, 0, width, height))
mask_right_width = get_distance_from_point_to_line(chin_right_point, nose_point, chin_bottom_point)
mask_right_width = int(mask_right_width * width_ratio)
mask_right_img = mask_right_img.resize((mask_right_width, new_height))

# merge mask
size = (mask_left_img.width + mask_right_img.width, new_height)
mask_img = Image.new('RGBA', size)
mask_img.paste(mask_left_img, (0, 0), mask_left_img)
mask_img.paste(mask_right_img, (mask_left_img.width, 0), mask_right_img)
上述代码主要做了如下内容:
- 调整左口罩大小,宽度为脸左点到中心线的距离 * 宽度系数 1.2
- 调整右口罩大小,宽度为脸右点到中心线的距离 * 宽度系数 1.2
get_distance_from_point_to_line 用来获取一个点到一条线的距离,具体实现可看源代码。
width_ratio 是宽度系数,用来适当扩大口罩。原因我们是根据脸颊的宽度计算口罩的宽度,但口罩是待在耳朵上的,真实宽度应该要更宽。
旋转口罩、并放到原图适当位置
# rotate mask
angle = np.arctan2(chin_bottom_point[1] - nose_point[1], chin_bottom_point[0] - nose_point[0])
rotated_mask_img = mask_img.rotate(angle, expand=True)

# calculate mask location
center_x = (nose_point[0] + chin_bottom_point[0]) // 2
center_y = (nose_point[1] + chin_bottom_point[1]) // 2

offset = mask_img.width // 2 - mask_left_img.width
radian = angle * np.pi / 180
box_x = center_x + int(offset * np.cos(radian)) - rotated_mask_img.width // 2
box_y = center_y + int(offset * np.sin(radian)) - rotated_mask_img.height // 2

# add mask
_face_img.paste(mask_img, (box_x, box_y), mask_img)
上述代码主要做了如下内容:
最后就是将新图片保存到本地路径,代码不再展示。
总结
我们借助 face_recognition 库可以轻松的识别出人像,然后根据脸颊的宽度和鼻梁位置计算出口罩的大小、方向和位置,并最终生成出戴上口罩的图片。整个过程并不复杂,但在坐标计算上要格外小心,如此,我们便打造了一个短小精悍的“自动戴上口罩”程序!
参考资料
[1]face-mask: https://github.com/Prodesire/face-mask
[2]face_recognition: https://github.com/ageitgey/face_recognition
[3]Pillow: https://pillow.readthedocs.io/
[4]face-mask: https://github.com/Prodesire/face-mask


