大家好,我是猫哥 !
相信大家都玩过迷宫的游戏,对于简单的迷宫,我们可以一眼就看出通路,但是对于复杂的迷宫,可能要仔细寻找好久,甚至耗费数天,然后可能还要分别从入口和出口两头寻找才能找的到通路,甚至也可能找不到通路。
虽然走迷宫问题对于我们人类来讲比较复杂,但对于计算机来说却是很简单的问题。为什么这样说呢,因为看似复杂实则是有规可循的。
我们可以这么做,携带一根很长的绳子,从入口出发一直走,如果有岔路口就走最左边的岔口,直到走到死胡同或者找到出路。如果是死胡同则退回上一个岔路口,我们称之为岔口 A,
这时进入左边第二个岔口,进入第二个岔口后重复第一个岔口的步骤,直到找到出路或者死胡同退回来。当把该岔路口所有的岔口都走了一遍,还未找到出路就沿着绳子往回走,走到岔口 A 的前一个路口 B,重复上面的步骤。
不知道你有没有发现,这其实就是一个不断递归的过程,而这正是计算机所擅长的。
上面这种走迷宫的算法就是我们常说的深度优先遍历算法,与之相对的是广度优先遍历算法。有了理论基础,下面我们就来试着用 程序来实现一个走迷宫的小程序。
先来看看最终的效果视频。
生成迷宫
生成迷宫有很多种算法,常用的有递归回溯法、递归分割法和随机 Prim 算法,我们今天是用的最后一种算法。
该算法的主要步骤如下:
1、迷宫行和列必须为奇数
2、奇数行和奇数列的交叉点为路,其余点为墙,迷宫四周全是墙
3、选定一个为路的单元格(本例选 [1,1]),然后把它的邻墙放入列表 wall
4、当列表 wall 里还有墙时:
    4.1、从列表里随机选一面墙,如果这面墙分隔的两个单元格只有一个单元格被访问过
        4.1.1、那就从列表里移除这面墙,同时把墙打通
        4.1.2、将单元格标记为已访问
        4.1.3、将未访问的单元格的邻墙加入列表 wall
    4.2、如果这面墙两面的单元格都已经被访问过,那就从列表里移除这面墙
我们定义一个 Maze 类,用二维数组表示迷宫地图,其中 1 表示墙壁,0 表示路,然后初始化左上角为入口,右下角为出口,最后定义下方向向量。
class Maze:
def __init__(self, width, height):
self.width = width
self.height = height
self.map = [[0 if x % 2 == 1 and y % 2 == 1 else 1 for x in range(width)] for y in range(height)]
self.map[1][0] = 0 # 入口
self.map[height - 2][width - 1] = 0 # 出口
self.visited = []
# right up left down
self.dx = [1, 0, -1, 0]
self.dy = [0, -1
, 0, 1]
接下来就是生成迷宫的主函数了。
def generate(self):
    start = [1, 1]
    self.visited.append(start)
    wall_list = self.get_neighbor_wall(start)
    while wall_list:
        wall_position = random.choice(wall_list)
        neighbor_road = self.get_neighbor_road(wall_position)
        wall_list.remove(wall_position)
        self.deal_with_not_visited(neighbor_road[0], wall_position, wall_list)
        self.deal_with_not_visited(neighbor_road[1], wall_position, wall_list)
该函数里面有两个主要函数 get_neighbor_road(point) 和 deal_with_not_visited(),前者会获得传入坐标点 point 的邻路节点,返回值是一个二维数组,后者 deal_with_not_visited() 函数处理步骤 4.1 的逻辑。
由于 Prim 随机算法是随机的从列表中的所有的单元格进行随机选择,新加入的单元格和旧加入的单元格被选中的概率是一样的,因此其分支较多,生成的迷宫较复杂,难度较大,当然看起来也更自然些。生成的迷宫。
[1, 1, 1, 1, 1, 1, 1, 1, 1, 1, 1]
[0, 0, 0, 0, 0, 0, 0, 0, 0, 0, 1]
[1, 1, 1, 1, 1, 0, 1, 1, 1, 1, 1]
[1, 0, 0, 0, 0, 0, 0, 0, 0, 0, 1]
[1, 1, 1, 0, 1, 0, 1, 0, 1, 0, 1]
[1, 0, 0, 0, 1, 0, 1, 0, 1, 0, 1]
[1, 0, 1, 0, 1, 0, 1, 1, 1, 1, 1]
[1, 0, 1, 0, 1, 0, 0, 0, 0, 0, 1]
[1, 0, 1, 0, 1, 1, 1, 0, 1, 0, 1]
[1, 0, 1, 0, 1, 0, 0, 0, 1, 0, 0]
[1, 1, 1, 1, 1, 1, 1, 1, 1, 1, 1]
走出迷宫
得到了迷宫的地图,接下来就按照我们文首的思路来走迷宫即可。主要函数逻辑如下:
def dfs(self, x, y, path, visited=[]):
    # outOfIndex
    if self.is_out_of_index(x, y):
        return False

    # visited or is wall
    if [x, y] in visited or self.get_value([x, y]) == 1:
        return False

    visited.append([x, y])
    path.append([x, y])

    # end...
    if x == self.width - 2 and y == self.height - 2:
        return True

    # recursive
    for i in range(4):
        if 0 1 and 0 1 and \
                self.get_value([x + self.dx[i], y + self.dy[i]]) == 0:
            if self.dfs(x + self.dx[i], y + self.dy[i], path, visited):
                return True
            elif not self.is_out_of_index(x, y) and path[-1] != [x, y]:
                path.append([x, y])
很明显,这就是一个典型的递归程序。当该节点坐标越界、该节点被访问过或者该节点是墙壁的时候,直接返回,因为该节点肯定不是我们要找的路径的一部分,否则就将该节点加入被访问过的节点和路径的集合中。
然后如果该节点是出口则表示程序执行结束,找到了通路。不然就遍历四个方向向量,将节点的邻路传入函数 dfs 继续以上步骤,直到找到出路或者程序所有节点都遍历完成。
来看看我们 dfs 得出的路径结果:
[[0, 1], [1, 1], [2, 1], [3, 1], [4, 1], [5, 1], [6, 1], [7, 1], [8, 1], [9, 1], [9, 1], [8, 1], [7, 1], [6, 1], [5, 1], [5, 2], [5, 3], [6, 3], [7, 3], [8, 3], [9, 3], [9, 4], [9, 5], [9, 5], [9, 4], [9, 3], [8, 3], [7, 3], [7, 4], [7, 5], [7, 5], [7, 4], [7, 3], [6, 3], [5, 3], [4, 3], [3, 3], [2, 3], [1, 3], [1, 3], [2, 3], [3, 3], [3, 4], [3, 5], [2, 5], [1, 5], [1, 6], [1, 7], [1, 8], [1, 9], [1, 9], [1, 8], [1, 7], [1, 6], [1, 5], [2, 5], [3, 5], [3, 6], [3, 7], [3, 8], [3, 9], [3, 9], [3, 8], [3, 7], [3, 6], [3, 5], [3, 4], [3, 3], [4, 3], [5, 3], [5, 4], [5, 5], [5, 6], [5, 7], [6, 7], [7, 7], [8, 7], [9, 7], [9, 8], [9, 9], [10, 9]]
可视化
有了迷宫地图和通路路径,剩下的工作就是将这些坐标点渲染出来。今天我们用的可视化库是 pyxel,这是一个用来写像素级游戏的 Python 库,
当然使用前需要先安装下这个库。
Win 用户直接用 pip install -U pyxel命令安装即可。
Mac 用户使用以下命令安装:
brew install python3 gcc sdl2 sdl2_image gifsicle
pip3 install -U pyxel
先来看个简单的 Demo。
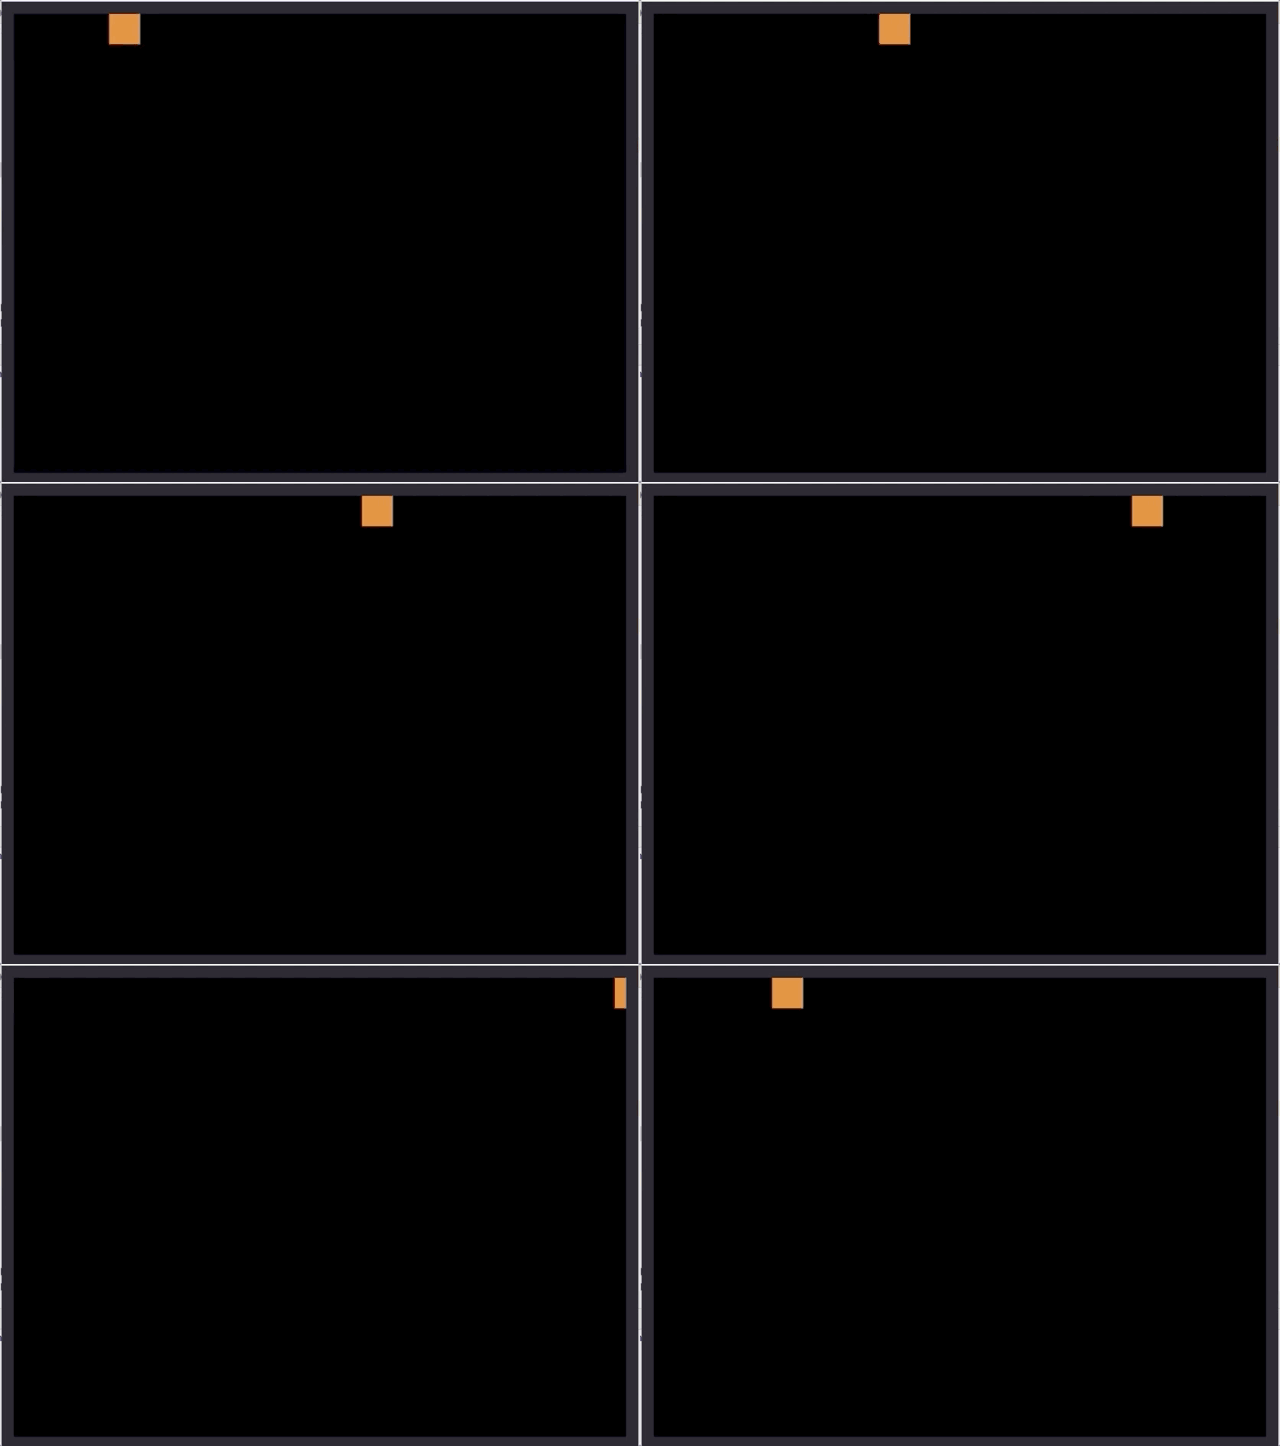
import pyxel

class App:
    def __init__(self):
        pyxel.init(160, 120)
        self.x = 0
        pyxel.run(self.update, self.draw)

    def update(self):
        self.x = (self.x + 1) % pyxel.width

    def draw(self):
        pyxel.cls(0)
        pyxel.rect(self.x, 0, 8, 8, 9)

App()
类 App 的执行逻辑就是不断的调用 update 函数和 draw 函数,因此可以在 update 函数中更新物体的坐标,然后在 draw 函数中将图像画到屏幕即可。
如此我们就先把迷宫画出来,然后在渲染 dfs 遍历动画。
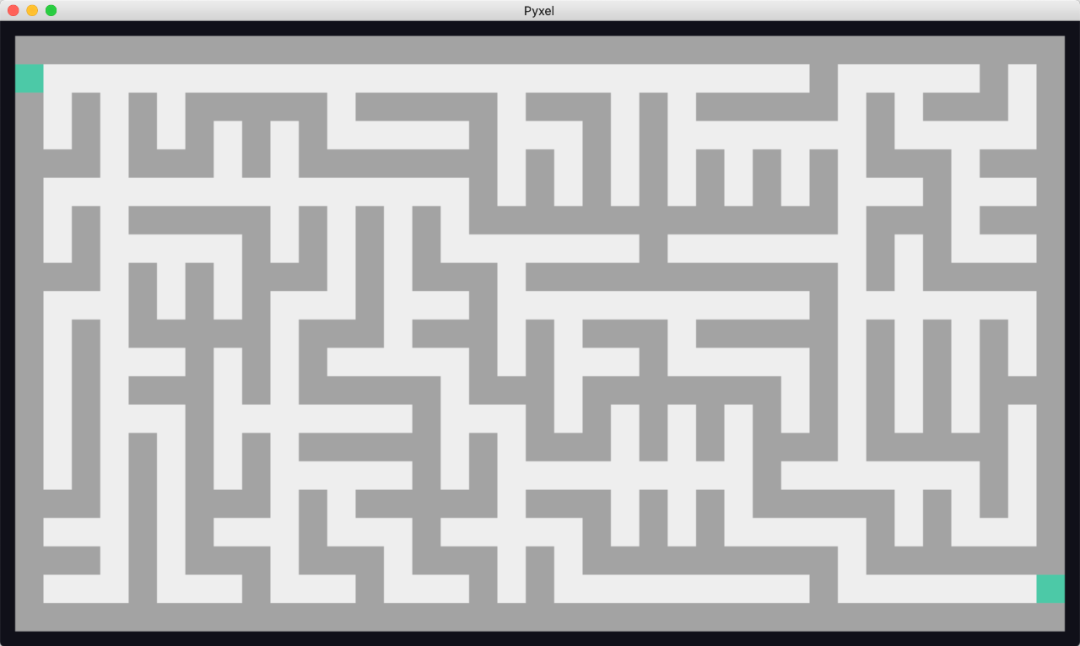
width, height = 37, 21
my_maze = Maze(width, height)
my_maze.generate()

class App:
    def __init__(self):
        pyxel.init(width * pixel, height * pixel)
        pyxel.run(self.update, self.draw)

    def update(self):
        if pyxel.btn(pyxel.KEY_Q):
            pyxel.quit()

        if pyxel.btn(pyxel.KEY_S):
            self.death = False

    def draw(self):
        # draw maze
        for x in range(height):
            for y in range(width):
                color = road_color if my_maze.map[x][y] is 0 else wall_color
                pyxel.rect(y * pixel, x * pixel, pixel, pixel, color)
        pyxel.rect(0, pixel, pixel, pixel, start_point_color)
        pyxel.rect((width - 1) * pixel, (height - 2) * pixel, pixel, pixel, end_point_color)

App()
看起来还可以,这里的宽和高我分别用了 37 和 21 个像素格来生成,所以生成的迷宫不是很复杂,如果像素点很多的话就会错综复杂了。
接下里来我们就需要修改 update 函数和 draw 函数来渲染路径了。为了方便操作,我们在 init 函数中新增几个属性。
self.index = 0
self.route = [] # 用于记录待渲染的路径
self.step = 1  # 步长,数值越小速度越快,1:每次一格;10:每次 1/10 格
self.color = start_point_color
self.bfs_route = my_maze.bfs_route()
其中 index 和 step 是用来控制渲染速度的,在 draw 函数中 index 每次自增 1,然后再对 step 求余数得到当前的真实下标 real_index,简言之就是 index 每增加 step,real_index 才会加一,渲染路径向前走一步。
def draw(self):
# draw maze
for x in range(height):
for y in range(width):
color = road_color if my_maze.map[x][y] is 0 else wall_color
pyxel.rect(y * pixel, x * pixel, pixel, pixel, color)
pyxel.rect(0, pixel, pixel, pixel, start_point_color)
pyxel.rect((width - 1) * pixel, (height - 2) * pixel, pixel, pixel, end_point_color)
if self.index > 0:
# draw route
offset = pixel / 2
for i in range(len(self.route) - 1):
curr = self.route[i]
next = self.route[i + 1]
self.color = backtrack_color if curr in self.route[:i] and next in self.route[:i] else route_color
pyxel.line(curr[0] + offset, (curr[1] + offset), next[0] + offset, next[1] + offset, self.color)
pyxel.circ(self.route[-1][0] + 2, self.route[-1][1] + 2, 1, head_color)
def update(self):
    if pyxel.btn(pyxel.KEY_Q):
        pyxel.quit()

    if pyxel.btn(pyxel.KEY_S):
        self.death = False

    if not self.death:
        self.check_death()
        self.update_route()

def check_death(self):
    if self.dfs_model and len(self.route) == len(self.dfs_route) - 1:
        self.death = True
    elif not self.dfs_model and len(self.route) == len(self.bfs_route) - 1:
        self.death = True

def update_route(self):
    index = int(self.index / self.step)
    self.index += 1
    if index == len(self.route):  # move
        if self.dfs_model:
            self.route.append([pixel * self.dfs_route[index][0], pixel * self.dfs_route[index][1]])
        else:
            self.route.append([pixel * self.bfs_route[index][0], pixel * self.bfs_route[index][1]])

App()
至此,我们完整的从迷宫生成,到寻找路径,再到路径可视化已全部实现。直接调用主函数 App() 然后按 S 键盘开启游戏,就可以看到文首的效果了。
总结
今天我们用深度优先算法实现了迷宫的遍历,对于新手来说,递归这思路可能比较难理解,但这才是符合计算机思维的,随着经验的加深会理解越来越深刻的。
其次我们用 pyxel 库来实现路径可视化,难点在于坐标的计算更新,细节比较多且繁琐,当然读者也可以用其他库或者直接用网页来实现也可以。
游戏源码:
https://github.com/JustDoPython/python-examples/blob/master/doudou/2020-06-12-maze/maze.py
快来一试身手吧。
如果文章对你有帮助,欢迎转发/点赞/收藏~
近两年里,我原创和翻译了130+技术文章,主要关注Python进阶、小技巧、编程设计、PEP翻译、Python哲学等话题。现已集结出了一本电子书《优雅的Python》,请回复数字『1』,获取下载地址。
分享与在看是对我最大的支持!