python基础部分
Python打包exe文件
Python有如下发布方式:
. py文件:对于开源项目或者源码没那么重要的,直接提供源码,需要使用者自行安装Python并且安装依赖的各种库。
. pyc文件:有些公司或个人因为机密或者各种原因,不愿意源码被运行者看到,可以使用pyc文件发布,pyc文件是Python解释器可以识别的二进制码,故发布后也是跨平台的,需要使用者安装相应版本的Python和依赖库。
可执行文件:对于非码农用户或者一些小白用户,最简单的方式就是提供一个可执行文件,只需要把用法告诉他即可。比较麻烦的是需要针对不同平台需要打包不同的可执行文件。
pyinstaller
pip install pyinstaller
如果安装不成功,不是安装不了,是缺了点东西,pycharm会提醒你。
打包模式:
pyinstaller - F mycript. py
pyinstaller - F - w - pD: \tmp\core- python\libs - i d: \tmp\main. ico main. py
- F 表示生成单个可执行文件;
- D –onedir 创建一个目录,包含exe文件,但会依赖很多文件(默认选项)。
- w 表示去掉控制台窗口,这在GUI界面时非常有用。不过如果是命令行程序的话那就把这个选项删除吧!;
- c –console, –nowindowed 使用控制台,无界面( 默认) ;
- p 表示你自己自定义需要加载的类路径,一般情况下用不到;
- i 表示可执行文件的图标。
Python爬虫
Scrapy框架
抓取网页:
慕课网
首先,安装一下Scrapy。
接着,建立工程文件:
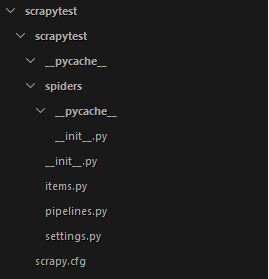
scrapy startproject scrapytest
创建爬虫文件:
我们在scrapytest/spiders/目录下创建一个文件MySpider.py
import scrapy
class MySpider ( scrapy. Spider) :
name = "MySpider"
allowed_domains = [ ]
start_urls = [ ]
def parse ( self, response) :
pass
定义一个容器,保存爬取的数据。
我们在工程目录下可以看到一个items文件,我们可以更改这个文件或者创建一个新的文件来定义我们的item。
CourseItems.py的代码如下:
import scrapy
class CourseItem ( scrapy. Item) :
title = scrapy. Field( )
url = scrapy. Field( )
image_url = scrapy. Field( )
introduction = scrapy. Field( )
student = scrapy. Field( )
常用方法如下:
course = CourseItem( )
course[ 'title' ] = "语文"
course[ 'title' ]
course. get( 'title' )
course. keys( )
course. items( )
重新编写爬虫文件MySpider.py:
import scrapy
from scrapytest. CourseItems import CourseItem
class MySpider ( scrapy. Spider) :
name = "MySpider"
allowed_domains = [ "imooc.com" ]
start_urls = [ "http://www.imooc.com/course/list" ]
def parse ( self, response) :
item = CourseItem( )
for box in response. xpath( '···' ) :
item[ 'url' ] = ···
item[ 'title' ] = ···
item[ 'image_url' ] = ···
···
yield item
1 2 3 4 5 6 7 8 9 10 11 12 13 14 15 16 17 18 19 20 21 22 23 24 25 26 27 28 1 2 3 4 5 6 7 8 9 10 11 12 13 14 15 16 17 18 19 20 21 22 23 24 25 26 27 28
运行scrapy框架:
在命令行下进入工程文件夹,然后运行
scrapy crawl MySpider
使用Pipeline处理数据:
当Item在Spider中被收集之后,它将会被传递到Pipeline,一些组件会按照一定的顺序执行对Item的处理。
Pipeline经常进行一下一些操作:
清理HTML数据
验证爬取的数据( 检查item包含某些字段)
查重( 并丢弃)
将爬取结果保存到数据库中
首先在scrapytest/目录下建立一个文件MyPipelines.py
找到settings.py文件,这个文件时爬虫的配置文件,在其中添加:
ITEM_PIPELINES = {
'scrapytest.MyPipelines.MyPipeline' : 1 ,
}
MyPipelines.py代码如下:
from scrapy. exceptions import DropItem
import json
class MyPipeline ( object ) :
def __init__ ( self) :
self. file = open ( 'data.json' , 'w' , encoding= 'utf-8' )
def process_item ( self, item, spider) :
line = json. dumps( dict ( item) , ensure_ascii= False ) + "\n"
self. file . write( line)
return item
def open_spider ( self, spider) :
pass
def close_spider ( self, spider) :
pass
1 2 3 4 5 6 7 8 9 10 11 12 13 14 15 16 17 18 19 20 21 22 1 2 3 4 5 6 7 8 9 10 11 12 13 14 15 16 17 18 19 20 21 22
接下来,执行命令:
scrapy crawl MySpider
就可以在项目根目录下发现data.json文件。
selenium
控制浏览器窗口大小:
driver.set_window_size(480, 800)
driver.back()
driver.forward()
刷新浏览器界面:
driver.refresh()
元素操作:
1 、clear( ) 清除文本,如果是一个文件输入框
2 、send_keys( * value) 在元素上模拟按键输入
3 、click( ) 单击元素
WebElement 接口常用方法:
submit( ) 方法用于提交表单,这里特别用于没提交按钮的情况,例如搜索框输入关键字之后的“回车”操作,那么就可以通过submit( ) 来提交搜索框的内容。
size 返回元素的尺寸。
text 获取元素的文本。
get_attribute( name) 获得属性值。
is_displayed( ) 设置该元素是否用户可见。
鼠标操作:
click_and_hold( element) 左键点击
context_click( elem) 右击
double_click( elem)
( source, target) 拖动
move_to_element( elem) 鼠标悬停
键盘操作:(这个比较重要啦)
from selenium. webdriver. common. keys import Keys
send_keys( Keys. BACK_SPACE) 删除键(BackSpace)
send_keys( Keys. SPACE) 空格键( Space)
send_keys( Keys. TAB) 制表键( Tab)
send_keys( Keys. ESCAPE) 回退键(Esc)
send_keys( Keys. ENTER) 回车键(Enter)
send_keys( Keys. CONTROL, 'a' ) 全选(Ctrl+ A)
send_keys( Keys. CONTROL, 'c' ) 复制(Ctrl+ C)
send_keys( Keys. CONTROL, 'x' ) 剪切(Ctrl+ X)
send_keys( Keys. CONTROL, 'v' ) 粘贴(Ctrl+ V)
send_keys( Keys. F1) 键盘F1
……
send_keys( Keys. F12) 键盘F12
多表单切换:
在web 应用中经常会遇到frame 嵌套页面的应用,页WebDriver 每次只能在一个页面上识别元素,对于frame 嵌套内的页面上的元素,直接定位是定位是定位不到的。这个时候就需要通过switch_to_frame()方法将当前定位的主体切换了frame 里。
还没有遇到过,因为平时切界面的时候都会换网址。
这时候估计就要用这个技术了吧。
switch_to_frame() 默认可以直接取表单的id 或name 属性进行切换,如果iframe 没有可用的id 和name 可以通过下面的方式进行定位:
xf = driver. find_element_by_xpath( '//*[@class="if"]' )
driver. switch_to_frame( xf)
driver. switch_to_default_content( )
如果完成了在当前表单上的操作可以通过switch_to_default_content()方法返回到上一层单。该方法不用指定某个表单的返回,默认对应与它最近的switch_to_frame()方法。
多窗口切换
有时候需要在不同的窗口切换,从而操作不同的窗口上的元素,WebDriver 提供了switch_to_window()方法可以切换到任意的窗口。
其实,我并不知道这个和重定位界面有啥性能上的区别,难道是因为这样的话支持前进和后退吗!!!
警告框处理
在WebDriver 中处理JavaScript 所生成的alert、confirm 以及prompt 是很简单的。具体做法是使用switch_to_alert()方法定位到alert/confirm/prompt。然后使用text/accept/dismiss/send_keys 按需进行操做。
text 返回alert/ confirm/ prompt 中的文字信息。
accept 点击确认按钮。
dismiss 点击取消按钮,如果有的话。
send_keys 输入值,这个alert\confirm 没有对话框就不能用了,不然会报错。
上传文件
send_keys 实现上传:
from selenium import webdriver
import os
driver = webdriver. Firefox( )
file_path = 'file:///' + os.
. abspath( 'upfile.html' )
driver. get( file_path)
driver. find_element_by_name( "file" ) . send_keys( 'D:\\upload_file.txt' )
driver. quit( )
通过这种方法上传,就绕开了操作Windows 控件的步骤。如果能找上传的input 标签,那么基本都可以通过send_keys()方法向其输入一个文件地址来实现上传。
窗口截图!!!(这功能我一直想要)
Webdriver 提供了截图函数get_screenshot_as_file()来截取当前窗口。
from selenium import webdriver
driver = webdriver. Chrome( )
driver. get( 'http://www.baidu.com' )
try :
driver. find_element_by_id( 'kw_error' ) . send_key( 'selenium' )
driver. find_element_by_id( 'su' ) . click( )
except :
driver. get_screenshot_as_file( "D:\\baidu_error.jpg" )
driver. quit( )
数据分析
pandas
series常规操作:
sis = Series( [ - 2 ,- 1 , 0 , 1 , 2 ]
sis. to_frame( )
sis. value_counts( )
sis. size
sis. shape
sis. count( )
sis. min ( )
sis. max ( )
sis. median( )
sis. std( )
sis. sum ( )
sis. describe( )
sis. isnull( )
sis. fillna( 0 )
sis. isnull( ) . sum ( )
emmm,好吧,这个系列我写过。
数据分析师的修炼历程
那好吧,就拿个项目来糊弄一下了。
数据分析项目:马大师
本部分代码来自:朱小五是凹凸君呀的博客:小伙子不讲武德,竟用Python爬取了B站上1.4w条马老师视频数据来分析
马老师专栏在此,谁敢不笑?
https: // api. bilibili. com/ x/ web- interface/ web/ channel/ multiple/ list ?channel_id= 3503796 & sort_type= hot& page_size= 30
获取视频数据代码:
def get_data ( url, headers) :
data_m = pd. DataFrame( columns= [ 'id' , 'name' , 'view_count' , 'like_count' , 'duration' , 'author_name' , 'author_id' , 'bvid' ] )
html = requests. get( url, headers= headers) . content
data = json. loads( html. decode( 'utf-8' ) )
offset = data[ 'data' ] [ 'offset' ]
print ( offset)
for j in range ( 30 ) :
data_m = data_m. append( { 'id' : data[ 'data' ] [ 'list' ] [ j] [ 'id' ] , 'name' : data[ 'data' ] [ 'list' ] [ j] [ 'name' ] ,
'view_count' : data[ 'data' ] [ 'list' ] [ j] [ 'view_count' ] , 'like_count' : data[ 'data' ] [ 'list' ] [ j] [ 'like_count' ] ,
'duration' : data[ 'data' ] [ 'list' ] [ j] [ 'duration' ] , 'author_name' : data[ 'data' ] [ 'list' ] [ j] [ 'author_name' ] ,
'author_id' : data[ 'data' ] [ 'list' ] [ j] [ 'author_id' ] , 'bvid' : data[ 'data' ] [ 'list' ] [ j] [ 'bvid' ] } ,
ignore_index= True )
return ( offset, data_m)
爬取弹幕:
stylecloud. gen_stylecloud( text= ' ' . join( text1) ,
collocations= False ,
font_path= r'C:\Windows\Fonts\msyh.ttc' ,
icon_name= 'fas fa-play-circle' ,
size= 653 ,
output_name= '马保国词云图.png' )
Image( filename= '马保国词云图.png' )
数据可视化
pyechart 之我的网址
pyechart教程
pyechart案例
Pie——饼图比例显示
贴块儿代码吧
from pyecharts. charts import Pie
import pandas as pd
from pyecharts import options as opts
vote = pd. read_csv( "vote_result.csv" )
print ( vote)
print ( vote. values)
print ( vote. values. tolist( ) ) ;
c = (
Pie( )
. add(
"" ,
vote. values. tolist( ) ,
label_opts= opts. LabelOpts(
position= "outside" ,
formatter= "{a|{a}}{abg|}\n{hr|}\n {b|{b}: }{c} {per|{d}%} " ,
background_color= "#eee" ,
border_color= "#aaa" ,
border_width= 1 ,
border_radius= 4 ,
rich= {
"a" : { "color" : "#999" , "lineHeight" : 22 , "align" : "center" } ,
"abg" : {
"backgroundColor" : "#e3e3e3" ,
"width" : "100%" ,
"align" : "right" ,
"height" : 22 ,
"borderRadius" : [ 4 , 4 , 0 , 0 ] ,
} ,
"hr" : {
: "#aaa" ,
"width" : "100%" ,
"borderWidth" : 0.5 ,
"height" : 0 ,
} ,
"b" : { "fontSize" : 16 , "lineHeight" : 33 } ,
"per" : {
"color" : "#eee" ,
"backgroundColor" : "#334455" ,
"padding" : [ 2 , 4 ] ,
"borderRadius" : 2 ,
} ,
} ,
) ,
)
. set_global_opts( title_opts= opts. TitleOpts( title= "Pie-rate" ) )
. render( "pie_rich_label.html" )
)
1 2 3 4 5 6 7 8 9 10 11 12 13 14 15 16 17 18 19 20 21 22 23 24 25 26 27 28 29 30 31 32 33 34 35 36 37 38 39 40 41 42 43 44 45 46 47 48 49 50 51 52 53 54 1 2 3 4 5 6 7 8 9 10 11 12 13 14 15 16 17 18 19 20 21 22 23 24 25 26 27 28 29 30 31 32 33 34 35 36 37 38 39 40 41 42 43 44 45 46 47 48 49 50 51 52 53 54
vote_result.csv
Areas_of_interest, Votes
金融, 172
医疗保健, 136
市场业, 135
零售业, 101
制造业, 80
司法, 68
工程与科学, 50
保险业, 29
其它, 41
Python表白代码
本部分出自杨老师的告白文,喜欢的朋友自己去看杨老师的主页:
Eastmount
想看效果自己去运行。
一行表白代码
我稍微改了一点点:
print ( '\n' . join( [ '' . join( [ ( 'love广军哥哥' [ ( x- y) % 8 ] if ( ( x* 0.05 ) ** 2 + ( y* 0.1 ) ** 2 - 1 ) ** 3 - ( x* 0.05 ) ** 2 * ( y* 0.1 ) ** 3 <= 0 else ' ' ) for x in range ( - 30 , 30 ) ] ) for y in range ( 15 , - 15 , - 1 ) ] ) )
3D红色桃心
from mpl_toolkits. mplot3d import Axes3D
from matplotlib import cm
from matplotlib. ticker import LinearLocator, FormatStrFormatter
import matplotlib. pyplot as plt
import numpy as np
def heart_3d ( x, y, z) :
return ( x** 2 + ( 9 / 4 ) * y** 2 + z** 2 - 1 ) ** 3 - x** 2 * z** 3 - ( 9 / 80 ) * y** 2 * z** 3
def plot_implicit ( fn, bbox= ( - 1.5 , 1.5 ) ) :
xmin, xmax, ymin, ymax, zmin, zmax = bbox* 3
fig = plt. figure( )
ax = fig. add_subplot( 111 , projection= '3d' )
A = np. linspace( xmin, xmax, 100 )
B = np. linspace( xmin, xmax, 40 )
A1
A2 = np. meshgrid( A, A)
for z in B:
X, Y = A1, A2
Z = fn( X, Y, z)
cset = ax. contour( X, Y, Z+ z, [ z] , zdir= 'z' , colors= ( 'r' , ) )
for y in B:
X, Z = A1, A2
Y = fn( X, y, Z)
cset = ax. contour( X, Y+ y, Z, [ y] , zdir= 'y' , colors= ( 'red' , ) )
for x in B:
Y, Z = A1, A2
X = fn( x, Y, Z)
cset = ax. contour( X+ x, Y, Z, [ x] , zdir= 'x' , colors= ( 'red' , ) )
ax. set_zlim3d( zmin, zmax)
ax. set_xlim3d( xmin, xmax)
ax. set_ylim3d( ymin, ymax)
plt. show( )
if __name__ == '__main__' :
plot_implicit( heart_3d)
1 2 3 4 5 6 7 8 9 10 11 12 13 14 15 16 17 18 19 20 21 22 23 24 25 26 27 28 29 30 31 32 33 34 35 36 37 38 39 40 41 42 43 44 45 46 47 48 49 50 51 1 2 3 4 5 6 7 8 9 10 11 12 13 14 15 16 17 18 19 20 21 22 23 24 25 26 27 28 29 30 31 32 33 34 35 36 37 38 39 40
41 42 43 44 45 46 47 48 49 50 51
我的告白气球
一波狗粮猝不及防。
今天我跟好兄弟吃完饭,跟他说我这学期准备学车,准备找对象,他说一定是可以实现的,我觉得应该可以实现吧,,,,
要学前端找他:
这名没人用吧
,一个明明可以回家发展却想先靠自己实力的大佬。
唔仄lo咚锵
import turtle
import time
def chage_angle ( ) :
for i in range ( 200 ) :
turtle. right( 1 )
turtle. forward( 2 ) ;
def move_position ( x, y) :
turtle. hideturtle( )
turtle. up( )
turtle. goto( x, y)
turtle. down( )
turtle. showturtle( )
love = input ( "请输入表白语: " )
signature = input ( "请输入签名: " )
if love == '' :
love = "I LOVE YOU"
turtle. setup( width= 800 , height= 500 )
turtle. color( 'red' , 'pink' )
turtle. pensize( 3 )
turtle. speed( 1 )
move_position( x= 0 , y= - 180 )
turtle. left( 140 )
turtle. begin_fill( )
turtle. forward( 224 )
chage_angle( )
turtle. left( 120 )
chage_angle( )
turtle. forward( 224 )
turtle. end_fill( )
move_position( 0 , 20 )
turtle. hideturtle( )
turtle. color( '#CD5C5C' , 'pink' )
turtle. write( love, font= ( 'Arial' , 30 , 'bold' ) , align= 'center' )
if signature != '' :
turtle. color( 'red' , 'pink' )
time. sleep( 2 )
move_position( 180 , - 180 )
turtle. hideturtle( )
turtle. write( signature, font= (
, 20 ) , align= "left" )
window = turtle. Screen( )
window. exitonclick( )
1 2 3 4 5 6 7 8 9 10 11 12 13 14 15 16 17 18 19 20 21 22 23 24 25 26 27 28 29 30 31 32 33 34 35 36 37 38 39 40 41 42 43 44 45 46 47 48 49 50 51 52 53 54 55 56 57 58 59 60 61 1 2 3 4 5 6 7 8 9 10 11 12 13 14 15 16 17 18 19 20 21 22 23 24 25 26 27 28 29 30 31 32 33 34 35 36 37 38 39 40 41 42 43 44 45 46 47 48 49 50 51 52 53 54 55 56 57 58 59 60 61
Python好物推荐
Python跟我练
跟我练Python入门到精通
下周三,也就是2021年3.31,我将在CSDN上再次直播,这次的主题是“Python爬虫”,欢迎大家前来,先关注一下,不迷路哦
。
好的,到这儿吧。