类似Google Photos的应用程序使得通过文本查询在手机上搜索图像成为可能。值得注意的是,该应用程序不需要您根据内容为图像添加标签。例如,您可以在Google Photos应用程序中搜索猫或汤,并获得相关结果,尽管您的图像没有文本描述。
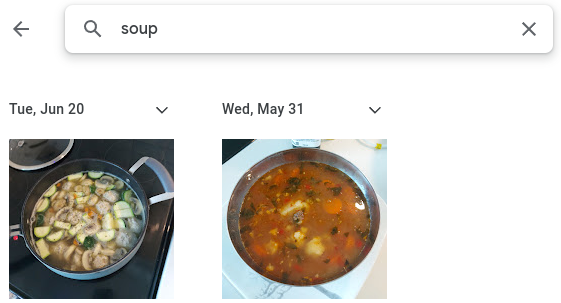
Google Photos应用程序搜索汤的示例
这个应用程序是如何做到的呢?这类应用程序理解场景的语义描述与场景本身的图像内容之间的联系。在本文中,我将演示如何使用Python编写自己的图像搜索应用程序。如果您想快速搜索本地计算机上的图像,但又不想因为隐私问题将文件上传到标准服务,这对您可能很有用。
我们将使用一个称为CLIP的预训练机器学习模型,该模型已经理解了我们需要的文本/图像联合表示。我们还将使用Streamlit作为应用程序的前端。
CLIP
对比语言-图像预训练(CLIP)是一种基于Radford等人(2021年)的论文的文本/图像多模态模型。CLIP模型是在从互联网获取的4亿对文本-图像示例上进行训练的。因此,该模型理解了各种场景的语义方面。对于我们的应用程序,我们将使用预训练模型将文本搜索项与图像数据库进行匹配。
Streamlit
Streamlit是一个面向机器学习应用程序开发的流行Python框架。Streamlit主要处理应用程序开发中的美学设计元素,这使我们主要关注机器学习方面。
应用程序开发
该应用程序由两个脚本组成:
下面是get_embeddings.py脚本的代码:
import osimport clipimport torchfrom torch.utils.data import Dataset, DataLoaderimport PILimport picklefrom tqdm import tqdm
class Images(Dataset): """Images dataset""" def __init__(self, image_list, transform): """ Args: image_list: List of image paths. transform : Transform to be applied on a sample. """ self.image_list = image_list self.transform = transform def __len__(self): return len(self.image_list) def __getitem__(self, idx): image_path = self.image_list[idx] image = PIL.Image.open(image_path) image = self.transform(image) data = {'image':image, 'img_path': image_path} return data if __name__ == '__main__': device = "cuda" if torch.cuda.is_available() else "cpu" model, preprocess = clip.load('ViT-B/32', device, jit=False) print(f'Device used: {device}') folder_path = '' image_list = [folder_path + file for
file in os.listdir(folder_path)] print('Attempting to open images...') cleaned_image_list = [] for image_path in image_list: try: PIL.Image.open(image_path) cleaned_image_list.append(image_path) except: print(f"Failed for {image_path}") print(f"There are {len(cleaned_image_list)} images that can be processed") dataset = Images(cleaned_image_list,preprocess) dataloader = DataLoader(dataset, batch_size=256, shuffle=True) print("Processing images...") image_paths = [] embeddings = [] for data in tqdm(dataloader): with torch.no_grad(): X = data['image'].to(device) image_embedding = model.encode_image(X) img_path = data['img_path'] image_paths.extend(img_path) embeddings.extend([torch.Tensor(x).unsqueeze(0).cpu() for x in image_embedding.tolist()])
image_embeddings = dict(zip(image_paths,embeddings)) print("Saving image embeddings") with open('embeddings.pkl','wb') as f: pickle.dump(image_embeddings,f)
这个Images类继承自pytorch Dataset类,并提供了将图像路径转换为pytorch张量的说明。在主函数中使用该数据集创建了一个pytorch Dataloader,允许一起处理图像批次。这种操作的向量化特性使其比逐个处理图像更快。
代码通过过滤在folder_path变量中指定的目录下的所有路径,以确保PIL能够读取这些图像。这也有助于删除任何杂散的文件,例如大规模下载的.artifacts文件。嵌入创建后,它们被保存在一个pickle文件中,以便被应用程序摄取。
以下是app.py脚本的代码:
import streamlit as stimport pandas as pdimport clipimport torchfrom sklearn.metrics.pairwise import cosine_similarityimport pickle
device = "cuda" if torch.cuda.is_available() else "cpu"model, preprocess = clip.load('ViT-B/32', device)
with open('embeddings.pkl','rb') as f: image_embeddings = pickle.load(f)
st.header('Image Search App')search_term = 'a picture of ' + st.text_input('Search: ')search_embedding = model.encode_text(clip.tokenize(search_term).to(device)).cpu().detach().numpy()
st.sidebar.header('App Settings')top_number = st.sidebar.slider('Number of Search Results', min_value=1, max_value=30)picture_width = st.sidebar.slider('Picture Width', min_value=100, max_value=500)
df_rank = pd.DataFrame(columns=['image_path','sim_score'])
for path,embedding in image_embeddings.items(): sim = cosine_similarity(embedding, search_embedding).flatten().item() df_rank = pd.concat([df_rank,pd.DataFrame(data=[[path,sim]],columns=['image_path','sim_score'])])df_rank.reset_index(inplace=True,drop=True)
df_rank.sort_values(by='sim_score', ascending=
False, inplace=True, ignore_index=True)
col1, col2, col3 = st.columns(3)
df_result = df_rank.head(top_number)for i in range(top_number): if i % 3 == 0: with col1: st.image(df_result.loc[i,'image_path'],width=picture_width) elif i % 3 == 1: with col2: st.image(df_result.loc[i,'image_path'],width=picture_width) elif i % 3 == 2: with col3: st.image(df_result.loc[i,'image_path'],width=picture_width)
该应用程序脚本加载了先前保存的图像嵌入。它从搜索栏中获取用户输入的搜索词,并用它创建一个文本嵌入。然后使用文本嵌入找到前n个相似的图像嵌入,然后在应用程序中显示它们。使用滑块可以选择搜索结果的数量和图像宽度。
演示
以下是用于在互联网图像数据集上搜索“狗”的streamlit应用程序的演示。
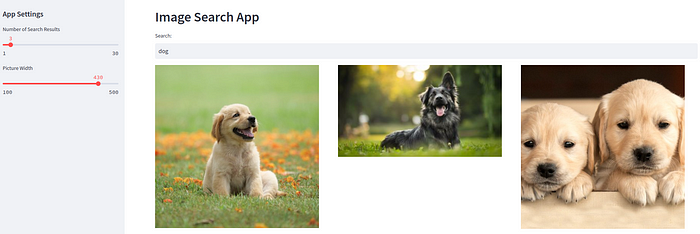
建议在Wide Mode中运行streamlit,该模式可从右上角的设置菜单中访问。
改进
该应用程序利用预训练的CLIP搜索与输入文本查询相匹配的图像。然而,可能存在一些专业应用场景,预训练的CLIP不太适用。例如,从包含许多汽车的数据库中找到特定汽车品牌是一项专业任务。对于这种任务,我们需要在带标签的汽车特定数据集上对CLIP进行微调。本系列的第二篇博文将演示如何在领域特定数据集上微调CLIP。


