如果给你一张图片作为背景,另外一张图片中的物体作为前景图,要把前景图中的物体叠加布置到背景图的中间位置,并且前景图中的物体需要在背景图中有旋转和投影,怎么处理?如果是一两张图,PS应该是首选,但是如果是批量的呢?这就是小编要准备处理的一个小问题。挑战一下,用Python+OpenCV来实现这个小目标。- 作为前景的图片的背景是白色不透明的,不过这就有条件实现抠图了
- 叠加的前景图需要可以控制旋转角度,但旋转同时也影响前景图的尺寸
- 为了让图片的叠加更加自然,还要考虑让前景物体在背景上投个影
为了看到中间过程,代码中添加了加轮廓线和掩码图两个中间图的输出。下面为抠图效果(左侧为轮廓线,,右侧图为掩码图)
1.1 通过cv2.bitwise_and()函数处理轮廓掩码
下面首先使用cv2.bitwise_and()函数处理。掩码图是有透明度控制层的,每个像素,在轮廓线外的的像素值是(B, G, R, A)=(0,0,0,0),轮廓线内的像素值是(B, G, R, A)=(255,255,255,255)。这种情况下,前景图中任何在轮廓线外的像素和掩码图对应位置的掩码像素进行按位“与”操作时,都会变成透明‘人’,而轮廓线内部的原图像素则会保留原值。
这里OpenCV中的一个函数是个关键。注意阈值thresh。
contours, _ = cv2.findContours(thresh, cv2.RETR_EXTERNAL, cv2.CHAIN_APPROX_SIMPLE)
import cv2import numpy as npimport tkinter as tk
def get_display_size(): root = tk.Tk() width = root.winfo_screenwidth() height = root.winfo_screenheight() root.quit() return width, height
def extract_contour_from_jpg(image_path, output_path): image = cv2.imread(image_path) if image.shape[2] == 3: # Assuming BGR without alpha image = cv2.cvtColor(image, cv2.COLOR_BGR2BGRA) gray = cv2.cvtColor(image, cv2.COLOR_BGR2GRAY)
_, thresh = cv2.threshold(gray, 240, 255, cv2.THRESH_BINARY_INV) contours, _ = cv2.findContours(thresh, cv2.RETR_EXTERNAL, cv2.CHAIN_APPROX_SIMPLE)
result = np.zeros_like(image)
for contour in contours: cv2.drawContours(result, [contour], -1, (255, 255, 255, 255), thickness=cv2.FILLED)
original_height, original_width = image.shape[:2] display_size = get_display_size() scale_width = display_size[0] / original_width scale_height = display_size[1] / original_height scale = min(scale_width, scale_height) new_width = int(original_width * scale) new_height = int(original_height * scale) image_contours = image.copy() cv2.drawContours(image_contours, contours, -1, (0, 255, 0, 255), thickness=2) # 绿色的轮廓线 resized_image = cv2.resize(image_contours, (new_width, new_height), interpolation=cv2.INTER_AREA)
cv2.imshow('contours', resized_image) cv2.waitKey(0) resized_resultimage = cv2.resize(result, (new_width, new_height), interpolation=cv2.INTER_AREA) cv2.imshow('resized_resultimage', resized_resultimage) cv2.waitKey(0) result = cv2.bitwise_and(image, result) cv2.imwrite(output_path, result)
if __name__=='__main__': input_file = "Your_ForGround_Image_Path.png"
output_file = "You_Output_transparent_Img_Path.png"
extract_contour_from_jpg(input_file, output_file)
通过上面的代码,我们可以得到前景图中的物体,并且使得物体周边的像素成为透明。下面的示意图是在PPT中操作的,仅仅是为了显示这个产品图已经成功取出,在图的背后添加了蓝色。
‘取出’物体和轮廓周边的毛刺
我们看看细节。是不是无法忍受这些毛刺?
所以,通过“cv2.bitwise_and()”处理后得到的物体还是有点问题,我们需要对物体的周边进行平滑处理。于是有了下面优化后的代码,通过“cv2.GaussianBlur()”这个函数对得到的填充后的轮廓灰度图的边沿进行羽化处理,就可以对于轮廓的周边进行平滑处理。
1.2 通过cv2.GaussianBlur()函数处理轮廓后的改善我们直接上代码。
import cv2import numpy as npimport tkinter as tk
def get_display_size():
root = tk.Tk() width = root.winfo_screenwidth() height = root.winfo_screenheight() root.quit() return width, height
def feather_object_contour(image_path, feather_size=10): image = cv2.imread(image_path, cv2.IMREAD_UNCHANGED) if image.shape[2] == 3: # Assuming BGR without alpha image = cv2.cvtColor(image, cv2.COLOR_BGR2BGRA) original_height, original_width = image.shape[:2] display_size = get_display_size() scale_width = display_size[0] / original_width scale_height = display_size[1] / original_height scale = min(scale_width, scale_height) new_width = int(original_width * scale) new_height = int(original_height * scale) gray = cv2.cvtColor(image, cv2.COLOR_BGR2GRAY) _, thresh = cv2.threshold(gray, 240, 255, cv2.THRESH_BINARY_INV)
contours, _ = cv2.findContours(thresh, cv2.RETR_EXTERNAL, cv2.CHAIN_APPROX_SIMPLE)
contour_mask = np.zeros_like(gray)
for contour in contours: cv2.drawContours(contour_mask, [contour], -1, (255, 255, 255, 255), thickness=cv2.FILLED) smoothed_mask = cv2.GaussianBlur(contour_mask, (feather_size, feather_size), 0) resized_image = cv2.resize(smoothed_mask, (new_width, new_height), interpolation=cv2.INTER_AREA)
cv2.imshow('feathered_mask', resized_image) cv2.waitKey(0) if image.shape[2] == 3: image = cv2.cvtColor(image, cv2.COLOR_BGR2BGRA) smoothed_alpha = (smoothed_mask.astype(np.float32) / 255.0) alpha_channel = (255 * smoothed_alpha).astype(np.uint8) image[..., 3] = alpha_channel return image
feathered_image = feather_object_contour('Your_ForGround_Image_Path.png', feather_size=5)cv2.imshow('Blurred Img', feathered_image)cv2.waitKey(0)cv2.imwrite('You_Output_transparent_Img_Path.png', feathered_image)
下面是效果图,可以和上面的图进行比较。
羽化平滑后‘取出’物体和轮廓周边的改善
既然有了上面PPT的效果,为什么还要用程序实现?
不如多问一句:如果类似的图处理有很多呢?
把这个取出的前景图按照比例进行缩放,移动,旋转,得到新的前景图,再通过前景图中的像素的透明度来控制两个图的叠加效果。但是要增加投影的话,实际上需要第三个图,也即投影图,并且投影的图中也需要一个柔和的过渡。
代码中设置了前景图和背景图的比例关系,避免了合成之后前景图尺寸的不一致。
合成图片的代码如下,效果图后随。
import cv2import numpy as np
"""要在图像合成中使用羽化(或模糊)处理前景图的透明边缘附近,以便在背景图上生成一个朝指定方向的阴影效果,可以通过以下步骤实现。这个过程通常涉及到对前景图的透明度(alpha 通道)进行处理,然后将其偏移并叠加到背景图上。"""def create_shadow_effect(image, feather_size=10, shadow_offset=(10,10), shadow_color=(0, 0, 0, 128)): alpha = image[:, :, 3]
feathered_alpha = cv2.GaussianBlur(alpha, (0, 0), sigmaX=feather_size, sigmaY=feather_size) shadow_layer = np.zeros_like(image) shadow_layer[:, :, :3] = shadow_color[:3] shadow_layer[:, :, 3] = feathered_alpha * (shadow_color[3] / 255.0)
shadow = np.zeros_like(image) x_offset, y_offset = shadow_offset
y_bound = min(shadow_layer.shape[0], shadow.shape[0] - y_offset) x_bound = min(shadow_layer.shape[1], shadow.shape[1] - x_offset)
shadow[y_offset:y_offset + y_bound, x_offset:x_offset + x_bound] = shadow_layer[:y_bound, :x_bound]
return shadow
def blend_images(background, foreground, shadow): for y in range(shadow.shape[0]): for x in range(shadow.shape[1]): alpha_shadow = shadow[y, x, 3] / 255.0 background[y, x, :3] = (shadow[y, x, :3] * alpha_shadow + background[y, x, :3] * (1 - alpha_shadow))
for y in range(foreground.shape[0]): for x in range(foreground.shape[1]): alpha_fg = foreground[y, x, 3] / 255.0 background[y, x, :3] = (foreground[y, x, :3] * alpha_fg + background[y, x, :3] * (1 - alpha_fg))def rotate_and_overlay(background_path, overlay_path, output_path, angle=30, feather_size=10): bg_image = cv2.imread(background_path, cv2.IMREAD_UNCHANGED) if bg_image.shape[2] == 3:
bg_image = cv2.cvtColor(bg_image, cv2.COLOR_BGR2BGRA) fg_image = cv2.imread(overlay_path, cv2.IMREAD_UNCHANGED) if fg_image.shape[2] == 3: fg_image = cv2.cvtColor(fg_image, cv2.COLOR_BGR2BGRA) original_height, original_width = fg_image.shape[:2] scale = 650.0/870.0 fg_new_width = int(original_width * scale) fg_new_height = int(original_height * scale) fg_image = cv2.resize(fg_image, (fg_new_width, fg_new_height), interpolation=cv2.INTER_AREA) fg_center = (fg_image.shape[1] // 2, fg_image.shape[0] // 2)
rot_matrix = cv2.getRotationMatrix2D(fg_center, angle, 1.0)
cos = np.abs(rot_matrix[0, 0]) sin = np.abs(rot_matrix[0, 1]) new_width = int((fg_image.shape[0] * sin) + (fg_image.shape[1] * cos)) new_height = int((fg_image.shape[0] * cos) + (fg_image.shape[1] * sin))
rot_matrix[0, 2] += (new_width / 2) - fg_center[0] rot_matrix[1, 2] += (new_height / 2) - fg_center[1]
rotated_fg = cv2.warpAffine(fg_image, rot_matrix, (new_width, new_height), borderMode=cv2.BORDER_CONSTANT, borderValue=(0, 0, 0, 0))
shadow = create_shadow_effect(rotated_fg, feather_size=feather_size) x_offset = (bg_image.shape[1] - shadow.shape[1]) // 2 y_offset = (bg_image.shape[0] - shadow.shape[0]) // 2 blend_images(bg_image[y_offset:y_offset + shadow.shape[0], x_offset:x_offset + shadow.shape[1]], rotated_fg, shadow)
cv2.imwrite(output_path, bg_image)
backGround_ImgPath = 'Your_backGround_ImgPath.png'forGround_ImgPath = 'Your_forGround_ImgPath.png'output_ImgPath = 'Your_output_ImgPath.png'rotate_and_overlay(backGround_ImgPath, forGround_ImgPath, output_ImgPath, feather_size=5)
测试代码的图片叠加效果如下。
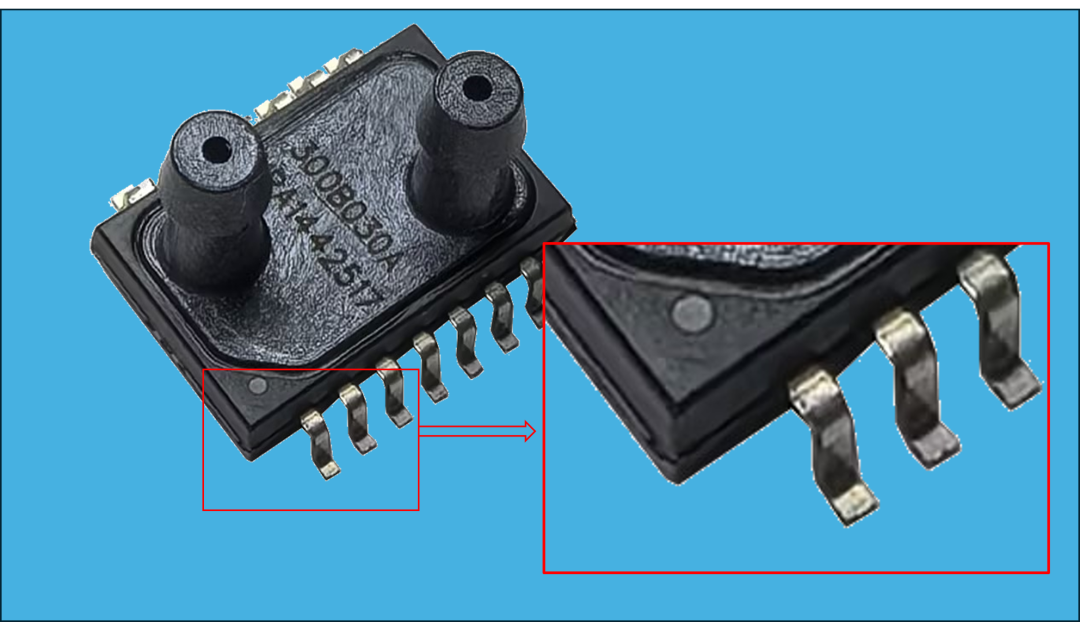
平滑处理后的合成图(加转角和投影效果)
局部看起来还可以。甚至可以看到这个传感器芯片的角度和前一个图中的产品相比有一个转角的变化。是的,这里把前景图整体转动了一个指定的角度。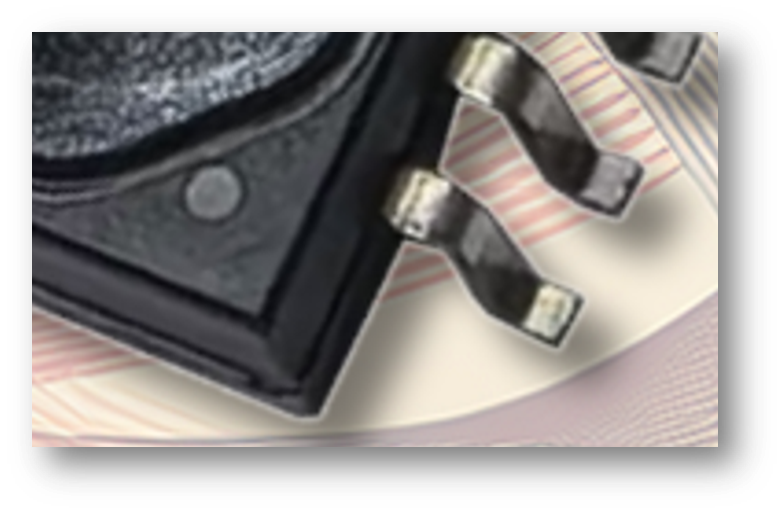
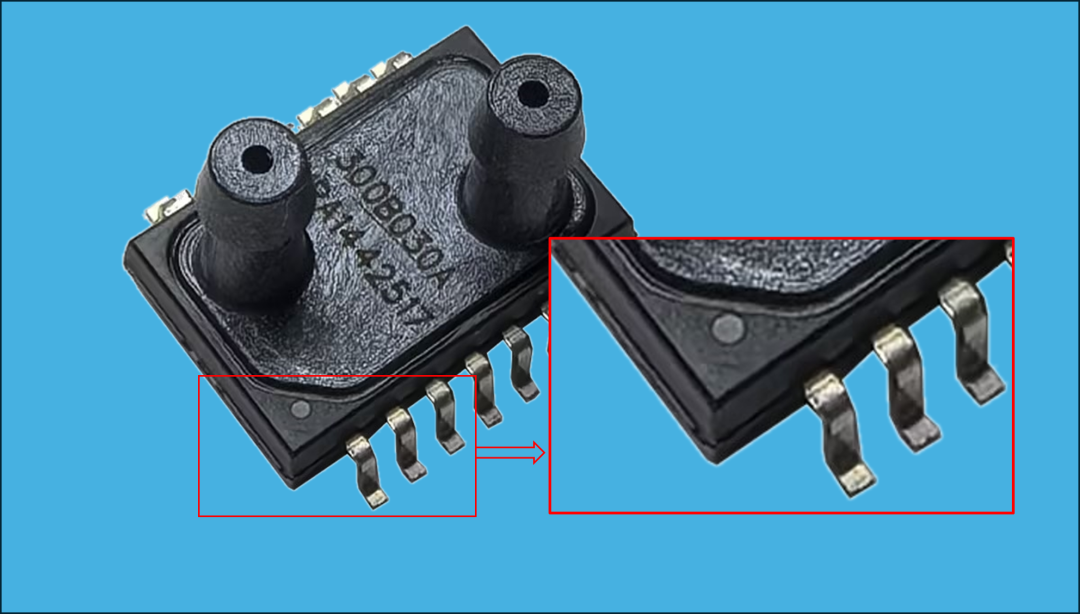
局部放大图(改善后的边缘)
上面就是小编要批量处理图片的工具了,图片量大的话,把代码调整修改之后,就可以对文件夹中的所有图片进行处理了,效率超过PhotoShop是没有问题的。


