一、YOLOv5网络
YOLOv5代码链接:https://github.com/ultralytics/yolov5
YOLOv5 于2020年6月发布!一经推出,便得到CV圈的瞩目,目前在各大目标检测竞赛、落地实战项目中得到广泛应用。
YOLOv5在COCO上的性能表现:
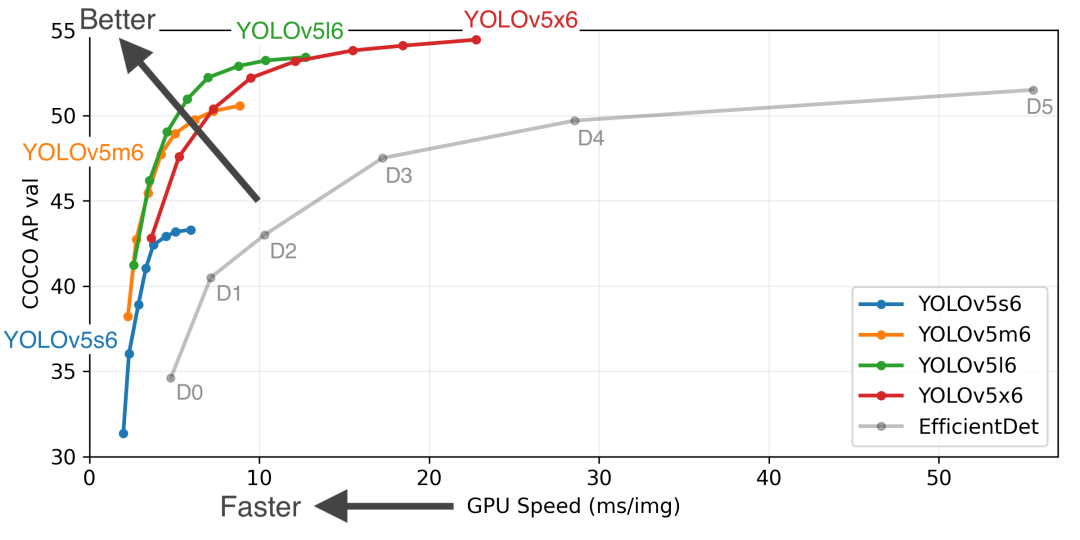
YOLOv5一共有4个版本,分别是Yolov5s、Yolov5m、Yolov5l、Yolov5x,其中性能依次增强。比如YOLOv5s模型参数量最小,速度最快,AP精度最低;YOLOv5x模型参数量最大,速度最慢,AP精度最高。
其中YOLOv5网络结构如下:
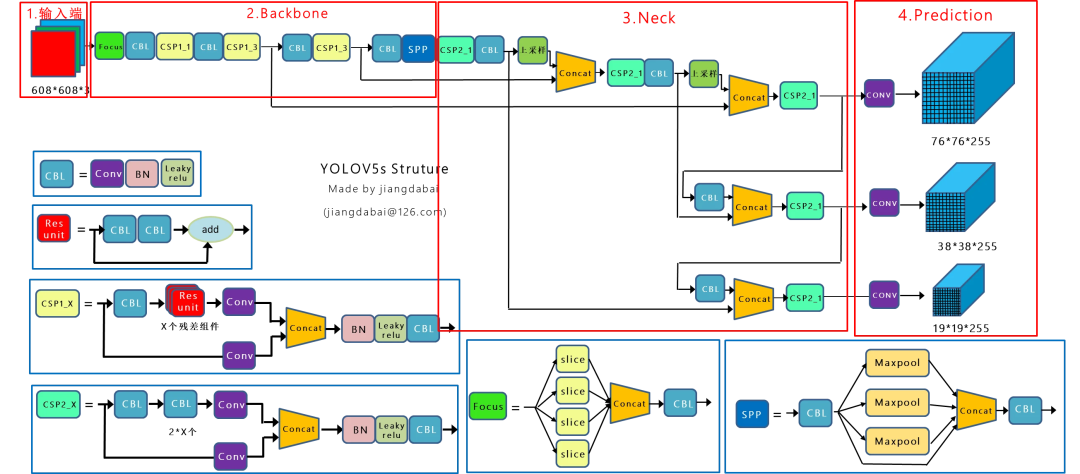
图源:https://zhuanlan.zhihu.com/p/172121380
二、OpenVINO™工具套件介绍

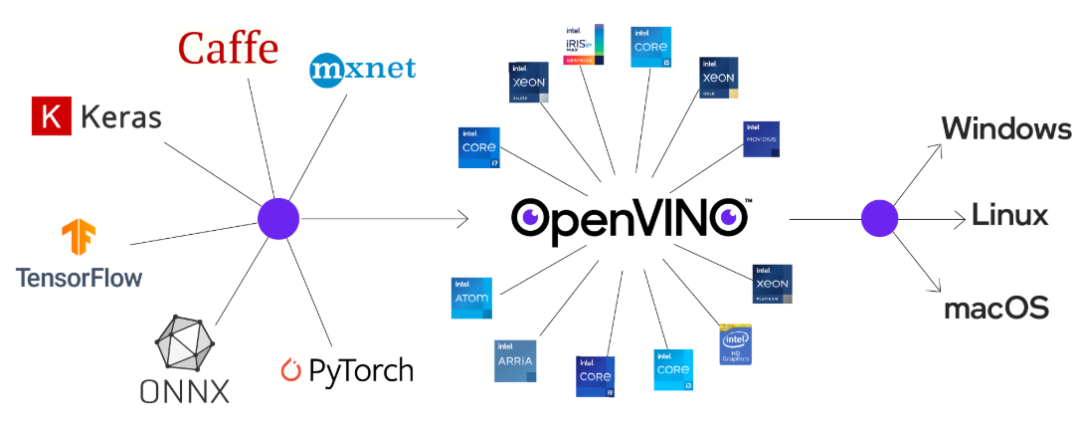
OpenVINO™工具套件是英特尔针对自家硬件平台开发的一套深度学习工具库,包含推理库,模型优化等等一系列与深度学习模型部署相关的功能。同时可以兼容各种开源框架训练好的模型,拥有算法模型上线部署的各种能力,只要掌握了该工具,你可以轻松的将预训练模型在英特尔的CPU、VPU等设备上快速部署起来。
三、重新训练YOLOv5
3.1 下载YOLOv5代码和权重文件
大家可以直接clone YOLOv5官方github代码:
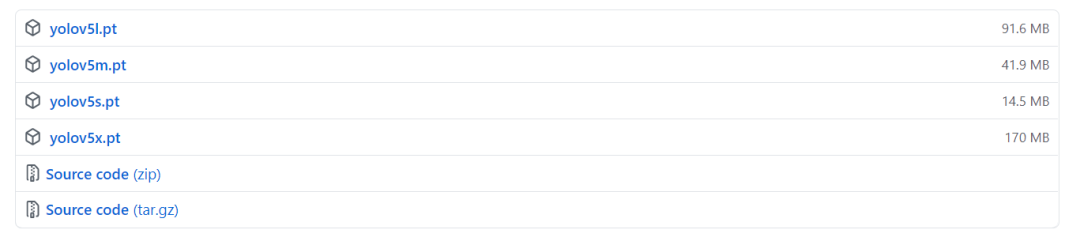
也可以在官方github的releases中下载正式发布的版本:
https://github.com/ultralytics/yolov5/releases
我们这里下载YOLOv5 v3.1版本的源代码和yolov5s.pt权重文件。值得注意,目前YOLOv5已更新至v5.0,但在实际转换OpenVINO™工具套件推理应用中遇到不少问题,为了方便使用,这里推荐较稳定的YOLOv5 v3.1版本。
3.2 数据集准备
数据集可以是自己标注的,也可以用网上开源的数据集。如果是标注自己的目标检测数据集,一般使用labelImg工具(超好用!支持COCO等格式)。
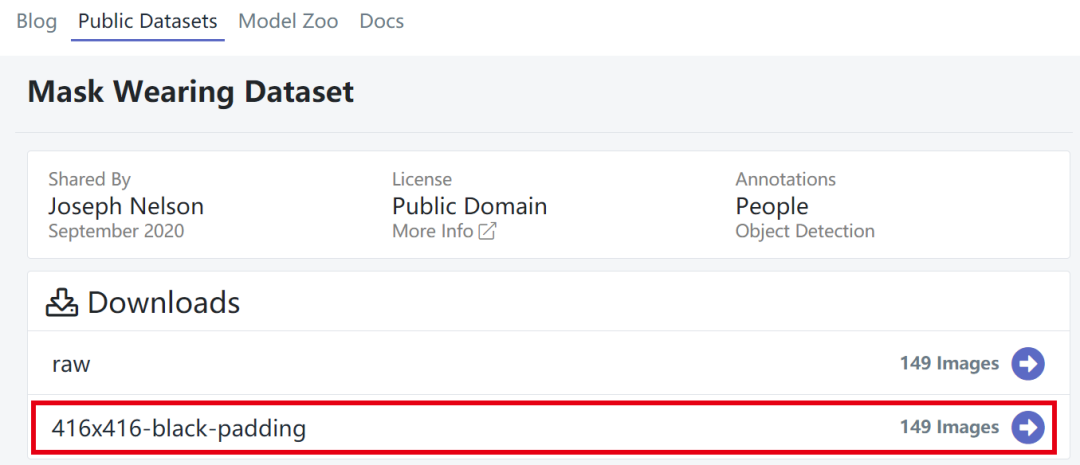
这里我们下载使用roboflow开源的口罩检测数据集(Mask Wearing Dataset),该数据集只有149幅图像,方便练手,而且格式直接支持YOLOv5!
https://public.roboflow.com/object-detection/mask-wearing
3.3 重新训练YOLOv5
3.3.1 修改参数
训练自定义数据集,一般需要修改两个参数:
其中,nc是一定要修改的,比较每个数据集的类别会不一样,而anchors可以不用修改,即默认自适应计算。
比如Mask Wearing数据集只有两种类别:mask和no-mask,所以nc = 2。可见data.yaml中的信息:
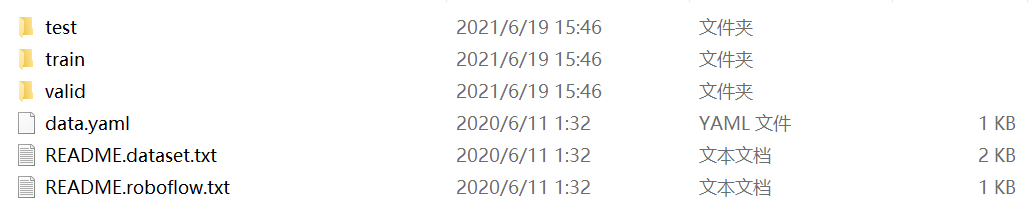
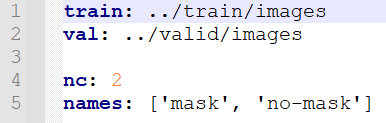
这里使用YOLOv5s进行训练,所以需要同步修改yolov5/models/yolov5s.yaml 文件中的nc数值,设置为2:

3.3.2 训练YOLOv5
训练命令如下:
python train.py --data 数据集路径/data.yaml --cfg models/yolov5s.yaml --weights '' --batch-size 64 --epochs 100
注:训练命令行的参数含义可参考:https://docs.ultralytics.com,比如batch size、epochs可以根据训练设备自行调整
训练完成后,权重文件会自动保存在runs文件夹中,自动生成last.pt和best.pt,如下图所示:

3.3.3 YOLOv5 Demo检测
对测试集中的图像进行检测,执行命令如下:
python detect.py --weight runs/exp6/weights/best.pt --source 数据集路径/test/images/1288126-10255706714jpg_jpg.rf.95f7324cbfd48e0386e0660b5e932223.jpg
输入图像:
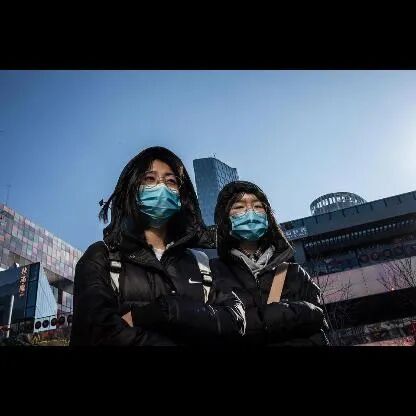
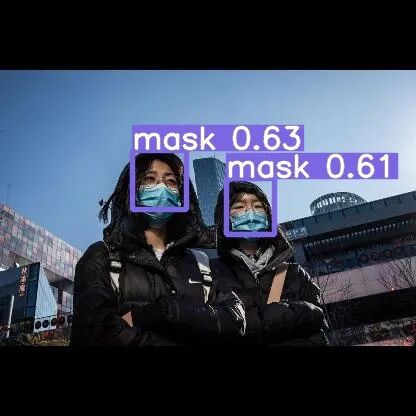
口罩检测结果:
四、模型转换(YOLOv5—>OpenVINO™工具套件)
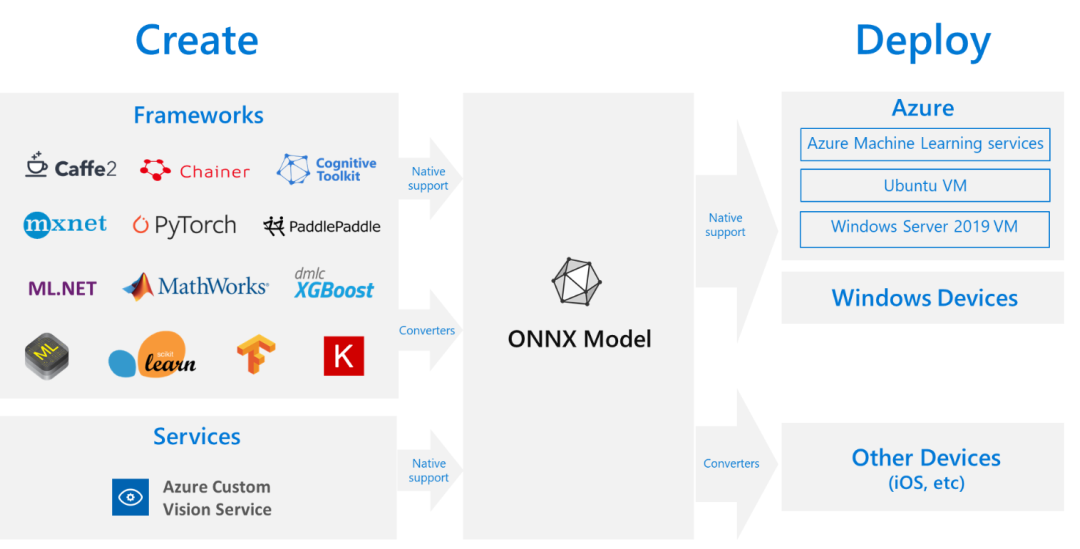
将YOLOv5的.pt训练权重文件转换成OpenVINO™工具套件调用的文件,主要的流程是:.pt 权重文件 —> ONNX 权重文件 —> IR 文件(.bin和xml)。其中利用ONNX(Open Neural Network Exchange,开放神经网络交换)进行文件格式转换。
使用版本说明:
-
Ubuntu 18.04
OpenVINO™工具套件 2021.03
4.1 .pt 权重文件 —> ONNX 权重文件
先安装ONNX,然后运行脚本,实现转换。
4.1.1 安装ONNX
ONNX的安装方法相对简单,直接pip安装即可:
4.1.2 ONNX转换
YOLOv5官方提供了转换成ONNX权重的脚本文件,位于yolov5/models/export.py,使用说明详见:https://github.com/ultralytics/yolov5/issues/251
注意,这里需要将export.py脚本文件中的opset_version修改为10:
torch.onnx.export(model, img, f, verbose=False, opset_version=10, input_names=['images'], output_names=['classes', 'boxes'] if y is None else ['output'])
然后再执行如下转换指令:
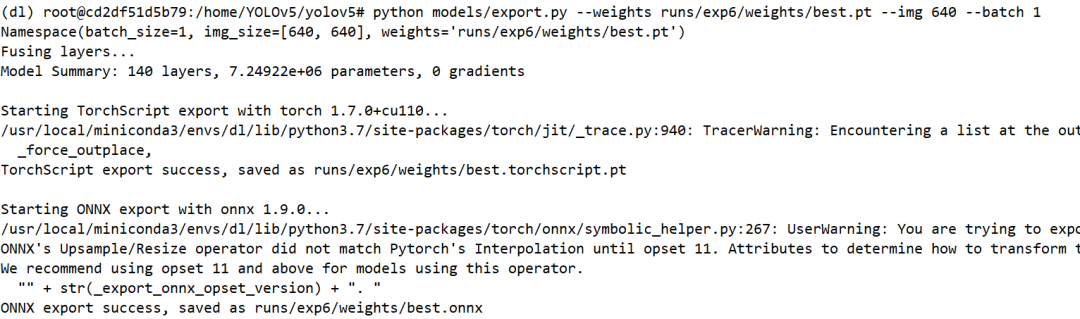
python models/export.py --weights runs/exp6/weights/best.pt --img 640 --batch 1
转换成功后,就会在runs/exp6/weights文件夹中生成best.onnx文件。
注:这里可以使用Netron打开yolov5s.onnx,进而可视化YOLOv5模型。
4.2 ONNX 权重文件 —> IR 文件(.bin和.xml)
先安装、配置OpenVINO™工具套件,然后运行脚本,实现转换。
4.2.1 安装OpenVINO™工具套件
安装OpenVINO™工具套件的方法有很多,详见官网:
https://docs.openvinotoolkit.org/latest/index.html
这里我是使用APT的方式,具体参考:https://docs.openvinotoolkit.org/latest/openvino_docs_install_guides_installing_openvino_apt.html
安装命令如下:
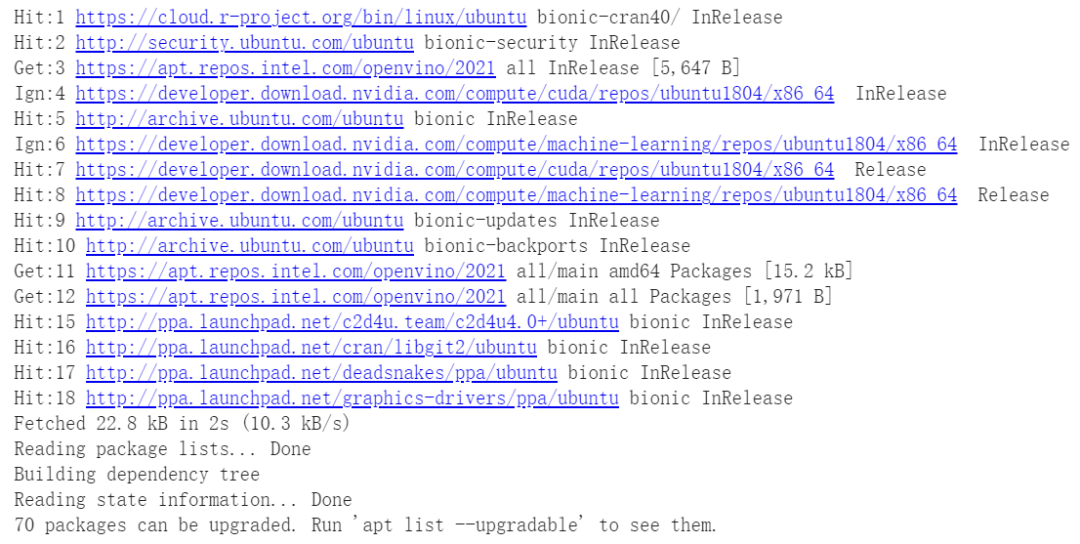
wget https:apt-key add GPG-PUB-KEY-INTEL-OPENVINO-2021apt-key listtouch /etc/apt/sources.list.d/intel-openvino-2021.listecho "deb https://apt.repos.intel.com/openvino/2021 all main" >> /etc/apt/sources.list.d/intel-openvino-2021.listapt update
执行完上述命令后,可出现:
然后搜索可下载的包,要注意系统版本:
sudo apt-cache search intel-openvino-dev-ubuntu18

这里安装intel-openvino-dev-ubuntu18-2021.3.394版本
apt install intel-openvino-dev-ubuntu18-2021.3.394
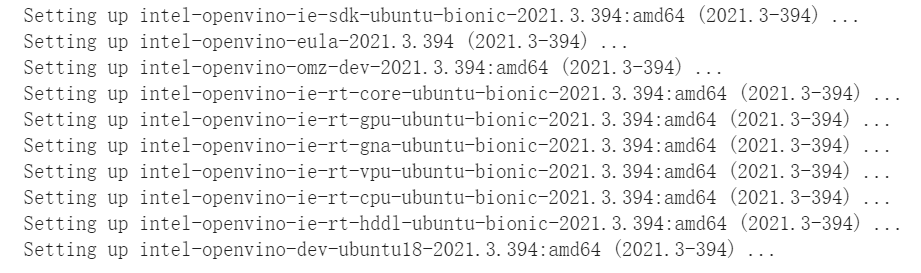
安装成功后,输出内容如下图所示:
4.2.2 OpenVINO™工具套件转换
安装好OpenVINO™工具套件后,我们需要使用OpenVINO™工具套件的模型优化器(Model Optimizer)将ONNX文件转换成IR(Intermediate Representation)文件。
首先设置 OpenVINO™工具套件的环境和变量:
source /opt/intel/openvino_2021/bin/setupvars.sh
然后运行如下脚本,实现ONNX模型到IR文件(.xml和.bin)的转换:
python /opt/intel/openvino_2021/deployment_tools/model_optimizer/mo.py --input_model runs/exp6/weights/best.onnx --model_name yolov5s_best -s 255 --reverse_input_channels --output Conv_487,Conv_471,Conv_455
关于命令行的参数用法,更多细节可参考:https://docs.openvinotoolkit.org/cn/latest/openvino_docs_MO_DG_prepare_model_convert_model_Converting_Model_General.html
转换成功后,即可得到yolov5s_best.xml 和 yolov5s_best.bin文件。

五、使用OpenVINO™工具套件进行推理部署
5.1 安装Python版的OpenVINO™工具套件
这里使用Python进行推理测试。因为我上面采用apt的方式安装OpenVINO™工具套件,这样安装后Python环境中并没有OpenVINO™工具套件,所以我这里需要用pip安装一下OpenVINO™工具套件。
注:如果你是编译源码等方式进行安装的,那么可以跳过这步:
另外,安装时要保持版本的一致性:

5.2 OpenVINO™工具套件实测
OpenVINO™工具套件官方提供了YOLOv3版本的Python推理demo,可以参考:
https://github.com/openvinotoolkit/open_model_zoo/blob/master/demos/object_detection_demo/python/object_detection_demo.py
我们这里参考这个已经适配好的YOLOv5版本:https://github.com/violet17/yolov5_demo/blob/main/yolov5_demo.py,该源代码的输入数据是camera或者video,所以我们可以将test数据集中的图像转换成视频(test.mp4)作为输入,或者可以自行修改成图像处理的代码。
其中YOLOv5版本相对于官方YOLOv3版本的主要修改点:
1. 自定义letterbox函数,预处理输入图像:
def letterbox(img, size=(640, 640), color=(114, 114, 114), auto=True, scaleFill=False, scaleup=True): shape = img.shape[:2] w, h = size
r = min(h / shape[0], w / shape[1]) if not scaleup: r = min(r, 1.0)
ratio = r, r new_unpad = int(round(shape[1] * r)), int(round(shape[0] * r)) dw, dh = w - new_unpad[0], h - new_unpad[1] if auto: dw, dh = np.mod(dw, 64), np.mod(dh, 64) elif scaleFill: dw, dh = 0.0, 0.0 new_unpad = (w, h) ratio = w / shape[1], h / shape[0]
dw /= 2 dh /= 2
if shape[::-1] != new_unpad: img = cv2.resize(img, new_unpad, interpolation=cv2.INTER_LINEAR) top, bottom = int(round(dh - 0.1)), int(round(dh + 0.1)) left, right = int(round(dw - 0.1)), int(round(dw + 0.1)) img = cv2.copyMakeBorder(img, top, bottom, left, right, cv2.BORDER_CONSTANT, value=color)
top2, bottom2, left2, right2 = 0, 0, 0, 0 if img.shape[0] != h: top2 = (h - img.shape[0])//2 bottom2 = top2 img = cv2.copyMakeBorder(img, top2, bottom2, left2, right2, cv2.BORDER_CONSTANT, value=color) elif img.shape[1] != w: left2 = (w - img.shape[1])//2 right2 = left2 img = cv2.copyMakeBorder(img, top2, bottom2, left2, right2, cv2.BORDER_CONSTANT, value=color) return img
2. 自定义parse_yolo_region函数, 使用Sigmoid函数的YOLO Region层 :
def parse_yolo_region(blob, resized_image_shape, original_im_shape, params, threshold): # ------------------------------------------ Validating output parameters ------------------------------------------ out_blob_n, out_blob_c, out_blob_h, out_blob_w = blob.shape predictions = 1.0/(1.0+np.exp(-blob)) assert out_blob_w == out_blob_h,
"Invalid size of output blob. It sould be in NCHW layout and height should " \ "be equal to width. Current height = {}, current width = {}" \ "".format(out_blob_h, out_blob_w)
# ------------------------------------------ Extracting layer parameters ------------------------------------------- orig_im_h, orig_im_w = original_im_shape resized_image_h, resized_image_w = resized_image_shape objects = list() side_square = params.side * params.side
# ------------------------------------------- Parsing YOLO Region output ------------------------------------------- bbox_size = int(out_blob_c/params.num) #4+1+num_classes
for row, col, n in np.ndindex(params.side, params.side, params.num): bbox = predictions[0, n*bbox_size:(n+1)*bbox_size, row, col] x, y, width, height, object_probability = bbox[:5] class_probabilities = bbox[5:] if object_probability < threshold: continue x = (2*x - 0.5 + col)*(resized_image_w/out_blob_w) y = (2*y - 0.5 + row)*(resized_image_h/out_blob_h) if int(resized_image_w/out_blob_w) == 8 & int(resized_image_h/out_blob_h) == 8: #80x80, idx = 0 elif int(resized_image_w/out_blob_w) == 16 & int(resized_image_h/out_blob_h) == 16: #40x40 idx = 1 elif int(resized_image_w/out_blob_w) == 32 & int(resized_image_h/out_blob_h) == 32: # 20x20 idx = 2
width = (2*width)**2* params.anchors[idx * 6 + 2 * n] height = (2*height)**2 * params.anchors[idx * 6 + 2 * n + 1] class_id = np.argmax(class_probabilities) confidence = object_probability objects.append(scale_bbox(x=x, y=y, height=height, width=width, class_id=class_id, confidence=confidence, im_h=orig_im_h, im_w=orig_im_w, resized_im_h=resized_image_h, resized_im_w=resized_image_w)) return objects
3. 自定义scale_bbox函数,进行边界框后处理 :
def scale_bbox(x, y, height, width, class_id, confidence, im_h, im_w, resized_im_h=640, resized_im_w=640): gain = min(resized_im_w / im_w, resized_im_h / im_h) # gain = old / new pad = (resized_im_w - im_w * gain) / 2, (resized_im_h - im_h * gain) / 2 # wh padding x = int((x - pad[0])/gain) y = int((y - pad[1])/gain)
w = int(width/gain) h = int(height/gain) xmin = max(0, int(x - w / 2)) ymin = max(0, int(y - h / 2)) xmax = min(im_w, int(xmin + w)) ymax = min(im_h, int(ymin + h)) return dict(xmin=xmin, xmax=xmax, ymin=ymin, ymax=ymax, class_id=class_id.item(), confidence=confidence.item())
但在实际测试中,会出现这个问题 'openvino.inference_engine.ie_api.IENetwork' object has no attribute 'layers' :
[ INFO ] Creating Inference Engine... [ INFO ] Loading network files: yolov5/yolov5s_best.xml yolov5/yolov5s_best.bin yolov5_demo.py:233: DeprecationWarning: Reading network using constructor is deprecated. Please, use IECore.read_network() method instead net = IENetwork(model=model_xml, weights=model_bin) Traceback (most recent call last): File "yolov5_demo.py", line 414, in sys.exit(main() or 0) File "yolov5_demo.py", line 238, in main not_supported_layers = [l for l in net.layers.keys() if l not in supported_layers] AttributeError: 'openvino.inference_engine.ie_api.IENetwork' object has no attribute 'layers'
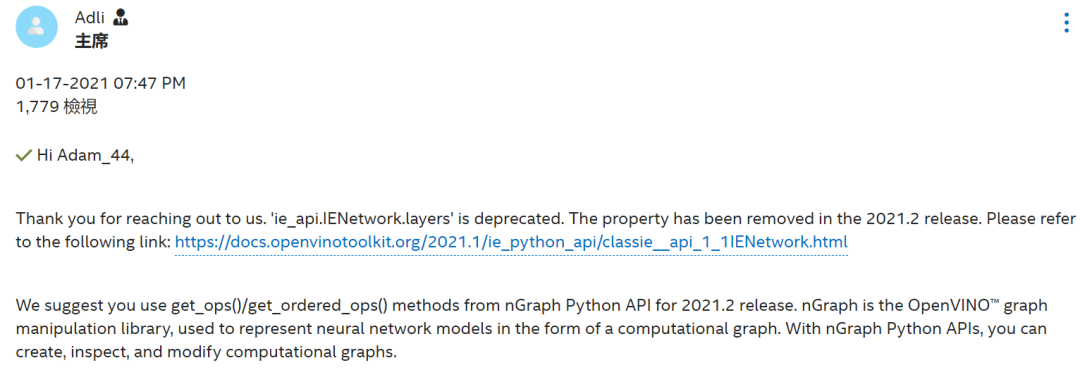
经过我调研后才得知,在OpenVINO™工具套件2021.02及以后版本, 'ie_api.IENetwork.layers' 就被官方删除了:
所以需要将第327、328行的内容:
out_blob = out_blob.reshape(net.layers[layer_name].out_data[0].shape) layer_params = YoloParams(net.layers[layer_name].params, out_blob.shape[2])
修改为:
out_blob = out_blob.reshape(net.outputs[layer_name].shape)params = [x._get_attributes() for x in function.get_ordered_ops() if x.get_friendly_name() == layer_name][0]layer_params = YoloParams(params, out_blob.shape[2])
并在第322行下面新添加一行代码:
function = ng.function_from_cnn(net)
最终在终端,输入下面命令:
python yolov5_demo.py -m yolov5/yolov5s_best.xml test.mp4
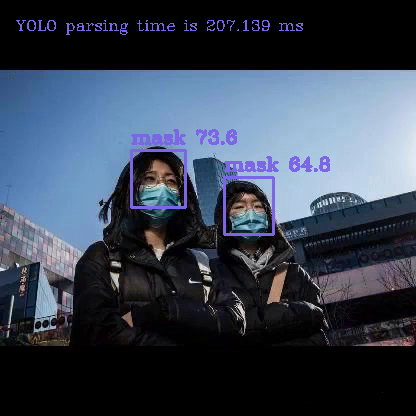
加上后处理,使用OpenVINO™工具套件的推理时间平均在220ms左右,测试平台为英特尔® 酷睿™ i5-7300HQ,而使用PyTorch CPU版本的推理时间平均在1.25s,可见OpenVINO™工具套件加速明显!
最终检测结果如下:
如果你想在CPU上实现模型的快速推理,可以试试OpenVINO™工具套件哦~